ここまで、Cocos Sharp の基本をご説明してきましたが、ここから実際にサンプルゲームを作成していき、より実戦に即したゲーム作成についてご説明していきます。
ゲームの概要
ゲームプレイヤーは敵キャラを率いる超知性体となりの進撃を防ぎます。
画面にタッチで敵キャラが配置され自機への攻撃を行ないます。
自機は自動で動き、攻撃を行ない配置された敵キャラを攻撃、破壊します。
自機が3機破壊された時点での進入距離の短さがスコアとなります。
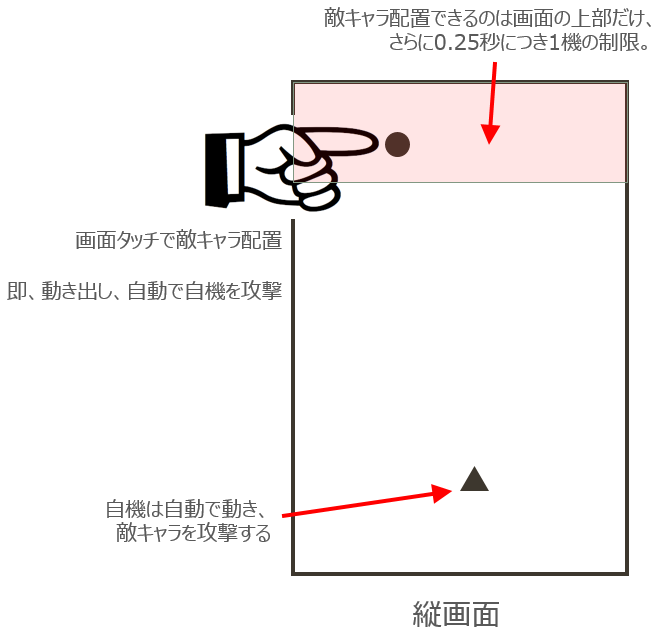
これから、このサンプルゲームを作成しながら、Cocos Sharp の実践的な使い方をご説明していきます。
では、これまでに作成したサンプルコードをゲームの概要に適するように変更していきます。
まずは、CocosSharpGameSample.iOS プロジェクトの AppDelegate.cs です。
加速度センサーに関する部分を削除します。
以下を削除します。
// 加速度センサー
private CMMotionManager cMMotionManager;
// ロックキー
private object accelerometerSyncLock = new object();
FinishedLaunching から加速度センサーに関する部分を削除します。
public override bool FinishedLaunching(UIApplication app, NSDictionary options)
{
	// ここから削除
	// 加速度センサーのセットアップ
	this.cMMotionManager = new CMMotionManager();
	// センサーの更新間隔
	cMMotionManager.AccelerometerUpdateInterval = 0.1d;
	// センサー更新時のハンドラの設定
	cMMotionManager.StartAccelerometerUpdates(NSOperationQueue.CurrentQueue, (data, error) =>
	{
		// センサーの値を書き込む
		lock (this.accelerometerSyncLock)
		{
			// 横向きなのでX,Yを入れ替え
			// X,Yの感度を調整するためセンサーのX,Y軸の取得値を調整
			AccelerometerInfo.Default.AccelerationX = data.Acceleration.Y * 8d;
			// 角度のオフセット
			double angleY = Math.Atan2(data.Acceleration.Z, data.Acceleration.X);
			AccelerometerInfo.Default.AccelerationY = Math.Sin(angleY - 30.6d) * 6d;
			AccelerometerInfo.Default.AccelerationZ = data.Acceleration.Z;
		}
	});
	// ここまで削除する

	// ゲームをを起動する。
	var application = new CCApplication();
	application.ApplicationDelegate = new SampleGameApplicationDelegate();
	application.StartGame();
	return true;
}
画面の向きを Portrait に固定に変更します。
// 画面の向きを Portrait に固定
[Export("application:supportedInterfaceOrientationsForWindow:")]
public UIInterfaceOrientationMask GetSupportedInterfaceOrientations(UIApplication application, IntPtr forWindow)
{
	return UIInterfaceOrientationMask.Portrait;
}
以上をまとめると、CocosSharpGameSample.iOS プロジェクトの AppDelegate.cs は以下の通りになります。
using System;
using Foundation;
using UIKit;
using CoreMotion;
using CocosSharp;
using CocosSharpGameSample.Core;

namespace CocosSharpGameSample.iOS
{
	[Register("AppDelegate")]
	public partial class AppDelegate : UIApplicationDelegate
	{

		public override bool FinishedLaunching(UIApplication app, NSDictionary options)
		{
			// ゲームをを起動する。
			var application = new CCApplication();
			application.ApplicationDelegate = new SampleGameApplicationDelegate();
			application.StartGame();
			return true;
		}

		// 画面の向きを Portrait に固定
		[Export("application:supportedInterfaceOrientationsForWindow:")]
		public UIInterfaceOrientationMask GetSupportedInterfaceOrientations(UIApplication application, IntPtr forWindow)
		{
			return UIInterfaceOrientationMask.Portrait;
		}

	}
}
自機の画像を縦画面用に差換えます。
Resources/Images/Character/Player/Player.png
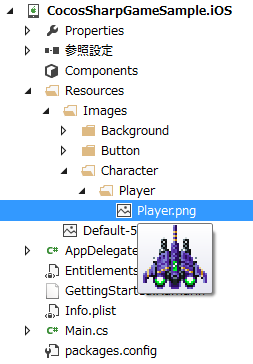
※自機の画像はハムコロ様の素材を利用させていただきました。

・制作者:ハムコロ様
・配付元:http://homepage2.nifty.com/hamcorossam
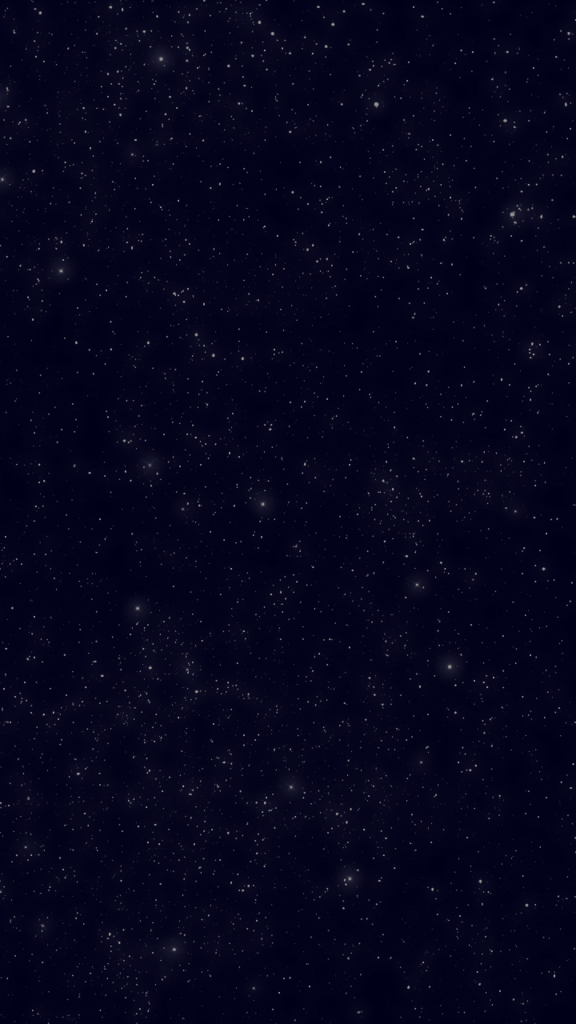
タイトルとゲームの背景画像を宇宙空間のものに差換えます。
Resources/Images/Background/GameBackground.png

次にCocosSharpGameSample.Android プロジェクトの MainActivity.cs を変更します。
加速度センサーに関する部分を削除します。
ISensorEventListener を削除します。
public class MainActivity : AndroidGameActivity/* この部分削除 , ISensorEventListener*/
以下を削除します。
// センサーマネージャ
private SensorManager sensorManager;
// ロックキー
private object accelerometerSyncLock = new object();
OnCreate からセンサーに関わる部分を削除します。
protected override void OnCreate(Bundle bundle)
{
	base.OnCreate(bundle);
	// ここから削除
	// センサーのセットアップ
	this.sensorManager = (SensorManager)GetSystemService(Context.SensorService);
	// ここまで削除
	// ゲームを起動する。
	var application = new CCApplication();
	application.ApplicationDelegate = new SampleGameApplicationDelegate();
	SetContentView(application.AndroidContentView);
	application.StartGame();
}
OnAccuracyChanged, OnSensorChanged, OnResume, OnPauseを削除します。
// センサーの精度が変更されたときのハンドラ
public void OnAccuracyChanged(Sensor sensor, SensorStatus accuracy)
{
	// 何もしない
}

// センサーの値が変更されたときのハンドラ
public void OnSensorChanged(SensorEvent e)
{
	lock (this.accelerometerSyncLock)
	{
		// 横向きなのでX,Yを入れ替え
		// X,Yの感度を調整するためセンサーのX,Y軸の取得値を調整
		AccelerometerInfo.Default.AccelerationX = e.Values[1] * 1.5f;
		// 角度のオフセット
		double angleY = Math.Atan2(e.Values[2], e.Values[0]);
		AccelerometerInfo.Default.AccelerationY = Math.Sin(angleY - 29.1d) * 12f;
		AccelerometerInfo.Default.AccelerationZ = e.Values[2];
	}
}

protected override void OnResume()
{
	base.OnResume();
	this.sensorManager.RegisterListener(this, sensorManager.GetDefaultSensor(SensorType.Accelerometer), SensorDelay.Game);
}

protected override void OnPause()
{
	base.OnPause();
	this.sensorManager.UnregisterListener(this);
}
画面の向きを Portrait に固定に変更します。
// 画面の向きを Portrait に固定
public override ScreenOrientation RequestedOrientation
{
	get
	{
		return ScreenOrientation.Portrait;
	}
	set
	{
		base.RequestedOrientation = ScreenOrientation.Portrait;
	}
}
以上をまとめると、CocosSharpGameSample.Android プロジェクトの MainActivity.cs は以下の通りになります。
using System;
using Android.App;
using Android.Content;
using Android.Content.PM;
using Android.Hardware;
using Android.OS;
using CocosSharp;
using CocosSharpGameSample.Core;
using Microsoft.Xna.Framework;

namespace CocosSharpGameSample.Android
{
	[Activity(Label = "CocosSharpGameSample.Android"
		, MainLauncher = true
		, Icon = "@drawable/icon"
		, AlwaysRetainTaskState = true
		, LaunchMode = LaunchMode.SingleInstance
		, ConfigurationChanges = ConfigChanges.Orientation | ConfigChanges.Keyboard | ConfigChanges.KeyboardHidden
	)]
	public class MainActivity : AndroidGameActivity
	{

		protected override void OnCreate(Bundle bundle)
		{
			base.OnCreate(bundle);
			// ゲームを起動する。
			var application = new CCApplication();
			application.ApplicationDelegate = new SampleGameApplicationDelegate();
			SetContentView(application.AndroidContentView);
			application.StartGame();
		}

		// 画面の向きを Portrait に固定
		public override ScreenOrientation RequestedOrientation
		{
			get
			{
				return ScreenOrientation.Portrait;
			}
			set
			{
				base.RequestedOrientation = ScreenOrientation.Portrait;
			}
		}

	}
}
自機の画像を縦画面用に差換えます。
Assets/Images/Character/Player/Player.png
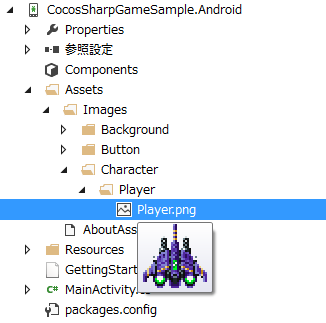
※自機の画像はハムコロ様の素材を利用させていただきました。

・制作者:ハムコロ様
・配付元:http://homepage2.nifty.com/hamcorossam
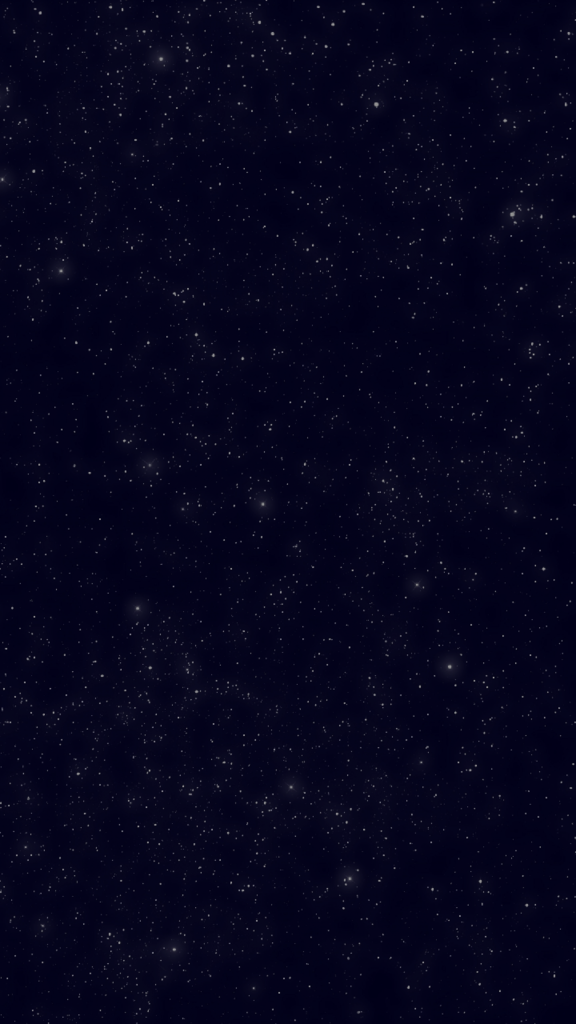
タイトルとゲームの背景画像を宇宙空間のものに差換えます。
Assets/Images/Background/GameBackground.png
次に、CocosSharpGameSample.Core プロジェクト、CrossCuttingConcerns/GameSettings.cs の画面サイズ設定を縦画面対応に変更します。
// 画面のサイズ
public const float ScreenWidth = 720f;
public const float ScreenHeight = 1280f;
以上をまとめると、CocosSharpGameSample.Core プロジェクト、CrossCuttingConcerns/GameSettings.cs は以下の通りになります。
using System;
using System.Collections.Generic;
using System.Linq;
using System.Text;

namespace CocosSharpGameSample.Core
{
	public class GameSettings
	{
		// 自機のサイズ
		public const float PlayerWidth = 32f;
		public const float PlayerHeight = 32f;

		// 画面のサイズ
		public const float ScreenWidth = 720f;
		public const float ScreenHeight = 1280f;

		// 加速度センサーの取得値の増幅倍率
		public const float AccelerationRatio = 3f;
	}
}
次に、CocosSharpGameSample.Core プロジェクト、Layers/GameLayer.cs からセンサーに関わる部分を削除します。
以下を削除します。
private CCLabel accelerationX;
private CCLabel accelerationY;
private CCLabel accelerationZ;
AddedToScene からセンサーに関わる部分を削除します。
protected override void AddedToScene()
{
	base.AddedToScene();
	// ゲーム画面の背景画像を配置
	var gameBackground = new CCSprite("/Resources/Images/Background/GameBackground.png", null);
	gameBackground.Position = new CCPoint(this.ContentSize.Center.X, this.ContentSize.Center.Y);
	AddChild(gameBackground);

	// ここから削除
	// モーションセンサーの値を表示するラベル
	this.accelerationX = new CCLabel(String.Empty, String.Empty, 40f, CCLabelFormat.SystemFont);
	this.accelerationX.HorizontalAlignment = CCTextAlignment.Left;
	this.accelerationX.VerticalAlignment = CCVerticalTextAlignment.Top;
	this.accelerationX.Color = CCColor3B.White;
	this.accelerationX.PositionX = 250f;
	this.accelerationX.PositionY = 120f;
	AddChild(this.accelerationX);

	this.accelerationY = new CCLabel(String.Empty, String.Empty, 40f, CCLabelFormat.SystemFont);
	this.accelerationY.HorizontalAlignment = CCTextAlignment.Left;
	this.accelerationY.VerticalAlignment = CCVerticalTextAlignment.Top;
	this.accelerationY.Color = CCColor3B.White;
	this.accelerationY.PositionX = 250f;
	this.accelerationY.PositionY = 80f;
	AddChild(this.accelerationY);

	this.accelerationZ = new CCLabel(String.Empty, String.Empty, 40f, CCLabelFormat.SystemFont);
	this.accelerationZ.HorizontalAlignment = CCTextAlignment.Left;
	this.accelerationZ.VerticalAlignment = CCVerticalTextAlignment.Top;
	this.accelerationZ.Color = CCColor3B.White;
	this.accelerationZ.PositionX = 250f;
	this.accelerationZ.PositionY = 40f;
	AddChild(this.accelerationZ);
	// ここまで削除

	// 自機を配置
	this.AddPlayer();

	this.StartScheduling();
}
StartScheduling からセンサーに関わる部分を削除します。
private void StartScheduling()
{
	// ここから削除
	this.Schedule(t => this.UpdateAccelerationLabels(), 0.2f);
	// ここまで削除
	this.Schedule(t => this.UpdatePlayer(), 0.02f);
}
UpdateAccelerationLabels を削除します。
// ここから削除
private void UpdateAccelerationLabels()
{
	this.accelerationX.Text = "X : " + (AccelerometerInfo.Default.AccelerationX >= 0 ? "+" : String.Empty) + AccelerometerInfo.Default.AccelerationX.ToString("0.00000000");
	this.accelerationY.Text = "Y : " + (AccelerometerInfo.Default.AccelerationY >= 0 ? "+" : String.Empty) + AccelerometerInfo.Default.AccelerationY.ToString("0.00000000");
	this.accelerationZ.Text = "Z : " + (AccelerometerInfo.Default.AccelerationZ >= 0 ? "+" : String.Empty) + AccelerometerInfo.Default.AccelerationZ.ToString("0.00000000");
}
// ここまで削除
UpdatePlayer からセンサーに関わる部分を削除します。
private void UpdatePlayer()
{
	// ここから削除
	float accelerationX = (float)AccelerometerInfo.Default.AccelerationX * GameSettings.AccelerationRatio;
	float accelerationY = -(float)AccelerometerInfo.Default.AccelerationY * GameSettings.AccelerationRatio;
	// ここまで削除

	// ここから変更
	this.player.PositionX = this.player.PositionX;
	this.player.PositionY = this.player.PositionY;
	// ここまで変更

	// 画面からはみ出ないように、位置の値の上限、下限を設定します。
	// 左
	if (this.player.PositionX < 0 + GameSettings.PlayerWidth)
	{
		this.player.PositionX = 0 + GameSettings.PlayerWidth;
	}
	// 右
	if (this.player.PositionX > GameSettings.ScreenWidth - GameSettings.PlayerWidth)
	{
		this.player.PositionX = GameSettings.ScreenWidth - GameSettings.PlayerWidth;
	}
	// 下
	if (this.player.PositionY < 0 + GameSettings.PlayerHeight)
	{
		this.player.PositionY = 0 + GameSettings.PlayerHeight;
	}
	// 上
	if (this.player.PositionY > GameSettings.ScreenHeight - GameSettings.PlayerHeight)
	{
		this.player.PositionY = GameSettings.ScreenHeight - GameSettings.PlayerHeight;
	}
}
以上をまとめると、CocosSharpGameSample.Core プロジェクト、CrossCuttingConcerns/GameLayer.cs は以下の通りになります。
using System;
using System.Diagnostics;
using CocosSharp;

namespace CocosSharpGameSample.Core
{
	public class GameLayer : LayerBase
	{

		private CCNode player;

		public GameLayer()
			: base()
		{
		}

		protected override void AddedToScene()
		{
			base.AddedToScene();
			// ゲーム画面の背景画像を配置
			var gameBackground = new CCSprite("/Resources/Images/Background/GameBackground.png", null);
			gameBackground.Position = new CCPoint(this.ContentSize.Center.X, this.ContentSize.Center.Y);
			AddChild(gameBackground);

			// 自機を配置
			this.AddPlayer();

			this.StartScheduling();
		}

		private void StartScheduling()
		{
			this.Schedule(t => this.UpdatePlayer(), 0.02f);
		}

		private void AddPlayer()
		{
			this.player = new CCSprite("/Resources/Images/Character/Player/Player.png", null);
			this.player.Position = new CCPoint(this.ContentSize.Center.X, this.ContentSize.Center.Y);
			this.AddChild(this.player);
		}

		private void UpdatePlayer()
		{
			this.player.PositionX = this.player.PositionX;
			this.player.PositionY = this.player.PositionY;

			// 画面からはみ出ないように、位置の値の上限、下限を設定します。
			// 左
			if (this.player.PositionX < 0 + GameSettings.PlayerWidth)
			{
				this.player.PositionX = 0 + GameSettings.PlayerWidth;
			}
			// 右
			if (this.player.PositionX > GameSettings.ScreenWidth - GameSettings.PlayerWidth)
			{
				this.player.PositionX = GameSettings.ScreenWidth - GameSettings.PlayerWidth;
			}
			// 下
			if (this.player.PositionY < 0 + GameSettings.PlayerHeight)
			{
				this.player.PositionY = 0 + GameSettings.PlayerHeight;
			}
			// 上
			if (this.player.PositionY > GameSettings.ScreenHeight - GameSettings.PlayerHeight)
			{
				this.player.PositionY = GameSettings.ScreenHeight - GameSettings.PlayerHeight;
			}
		}

	}
}
次に、CocosSharpGameSample.Core プロジェクト、Layers/TitleLayer.cs のタイトル背景画像を差換えます。
protected override void AddedToScene()
{
	base.AddedToScene();
	// タイトル画像を配置
	var title = new CCSprite("/Resources/Images/Background/GameBackground.png", null);// 画像を GameBackground.png に差換えます。
	title.Position = new CCPoint(this.ContentSize.Center.X, this.ContentSize.Center.Y);
	this.AddChild(title);

	// スタートボタンを配置
	var startButton = new CCSprite("/Resources/Images/Button/ButtonStart.png", null);
	startButton.Position = new CCPoint(this.ContentSize.Center.X, 100f);

	// 後から参照できるようにタグを設定
	startButton.Tag = (int)NodeTag.StartButton;
	this.AddChild(startButton);

	// ボタンタップ検出用のイベントリスナー作成
	var eventListener = new CCEventListenerTouchOneByOne();
	eventListener.OnTouchBegan = this.EventListener_TouchBegan;
	eventListener.OnTouchEnded = this.EventListener_TouchEnded;
	this.AddEventListener(eventListener, this);
}
以上をまとめると、CocosSharpGameSample.Core プロジェクト、CrossCuttingConcerns/TitleLayer.cs は以下の通りになります。
using CocosSharp;

namespace CocosSharpGameSample.Core
{
	public class TitleLayer : LayerBase
	{

		public TitleLayer()
			: base()
		{
		}

		protected override void AddedToScene()
		{
			base.AddedToScene();
			// タイトル画像を配置
			var title = new CCSprite("/Resources/Images/Background/GameBackground.png", null);
			title.Position = new CCPoint(this.ContentSize.Center.X, this.ContentSize.Center.Y);
			this.AddChild(title);

			// スタートボタンを配置
			var startButton = new CCSprite("/Resources/Images/Button/ButtonStart.png", null);
			startButton.Position = new CCPoint(this.ContentSize.Center.X, 100f);

			// 後から参照できるようにタグを設定
			startButton.Tag = (int)NodeTag.StartButton;
			this.AddChild(startButton);

			// ボタンタップ検出用のイベントリスナー作成
			var eventListener = new CCEventListenerTouchOneByOne();
			eventListener.OnTouchBegan = this.EventListener_TouchBegan;
			eventListener.OnTouchEnded = this.EventListener_TouchEnded;
			this.AddEventListener(eventListener, this);
		}

		private bool EventListener_TouchBegan(CCTouch touch, CCEvent e)
		{
			// OnTouchBegan で true を返却しないと、OnTouchEndedが発動しない。
			return true;
		}

		private void EventListener_TouchEnded(CCTouch touch, CCEvent e)
		{
			// タッチした座標でボタンが押されたかを判定
			CCNode startButton = this.GetChildByTag((int)NodeTag.StartButton);
			if (startButton.BoundingBox.ContainsPoint(touch.Location))
			{
				// 移動先のシーンを作成
				var newScene = new CCScene(this.Window);
				var gameLayer = new GameLayer();
				newScene.AddChild(gameLayer);

				// シーン切り替え時の効果を設定
				CCTransitionScene cCTransitionScene = new CCTransitionFade(1.0f, newScene);

				// ゲーム画面へシーン切り替え
				this.Director.ReplaceScene(cCTransitionScene);
			}
		}

	}
}
これで、縦画面のゲーム作成の準備が整いました。
今回は、ここまでです。