個人的なメモ

Tomohiro Suzuki @hiro128_777 のブログです。Microsoft MVP for Developer Technologies 2017- 本ブログと所属組織の公式見解は関係ございません。

CPU で Edge AI を試そう(2)

 
前の記事
hiro128.hatenablog.jp
 

はじめに

いまさらながらですが、Phi 3 を試してみるために、ローカルで実行してみるコンソールアプリを作ってみました。
 
リポジトリはこちらです。
github.com
 
モデルは Hugging Face から DL してください。
DL する cli のコマンドのサンプルは前回の記事を参照ください。
hiro128.hatenablog.jp
 

コード

以下のページを参考にコードを作成しました。
learn.microsoft.com
モデルをメモリに展開して、システムプロンプトとユーザープロンプトを投げて回答ストリーミングで表示するだけのシンプルなコードです

using Microsoft.Extensions.Configuration;
using Microsoft.ML.OnnxRuntimeGenAI;
using System.Diagnostics;
using System.Text;


var env = Environment.GetEnvironmentVariable("DOTNET_ENVIRONMENT") ?? string.Empty;
var configuration = new ConfigurationBuilder()
    .SetBasePath(Directory.GetCurrentDirectory())
    .AddJsonFile("appsettings.json")
    .AddJsonFile($"appsettings.{env}.json", true)
    .Build();

string modelPhi35Min128k = configuration["modelPhi35Min128k"] ?? throw new ArgumentNullException("modelPhi35Min128k is not found.");
string modelPhi3Med4k = configuration["modelPhi3Med4k"] ?? throw new ArgumentNullException("modelPhi3Med4k is not found.");
string modelPhi3Med128k = configuration["modelPhi3Med128k"] ?? throw new ArgumentNullException("modelPhi3Med128k is not found.");
string modelPhi3Min4k = configuration["modelPhi3Min4k"] ?? throw new ArgumentNullException("modelPhi3Min4k is not found.");
string modelPhi3Min128k = configuration["modelPhi3Min128k"] ?? throw new ArgumentNullException("modelPhi3Min128k is not found.");

var systemPrompt = configuration["systemPrompt"] ?? throw new ArgumentNullException("systemPrompt is not found.");
var userPrompt = configuration["userPrompt"] ?? throw new ArgumentNullException("userPrompt is not found.");

using OgaHandle ogaHandle = new OgaHandle();

// モデルのセットアップ
var modelPath = Path.Combine(AppDomain.CurrentDomain.BaseDirectory, modelPhi3Med128k);

var sw = Stopwatch.StartNew();
using Model model = new Model(modelPath);
using Tokenizer tokenizer = new Tokenizer(model);
sw.Stop();

Console.WriteLine($"\r\nModel loading time is {sw.Elapsed.Seconds:0.00} sec.\r\n");

// プロンプトのセットアップ
Console.WriteLine($"\r\nシステムプロンプト:\r\n{systemPrompt}");
Console.WriteLine($"\r\nユーザープロンプト:\r\n{userPrompt}\r\n");

var sequences = tokenizer.Encode($@"<|system|>{systemPrompt}<|end|><|user|>{userPrompt}<|end|><|assistant|>");

// プロンプトを投げて回答を得る
using GeneratorParams generatorParams = new GeneratorParams(model);
generatorParams.SetSearchOption("min_length", 100);
generatorParams.SetSearchOption("max_length", 2000);
generatorParams.TryGraphCaptureWithMaxBatchSize(1);
generatorParams.SetInputSequences(sequences);

using var tokenizerStream = tokenizer.CreateStream();
using var generator = new Generator(model, generatorParams);
StringBuilder stringBuilder = new();

Console.WriteLine("レスポンス:");

var totalTokens = 0;

string part;
sw = Stopwatch.StartNew();
while (!generator.IsDone())
{
    try
    {
        await Task.Delay(10).ConfigureAwait(false);
        generator.ComputeLogits();
        generator.GenerateNextToken();
        part = tokenizerStream.Decode(generator.GetSequence(0)[^1]);
        Console.Write(part);
        stringBuilder.Append(part);
        if (stringBuilder.ToString().Contains("<|end|>")
            || stringBuilder.ToString().Contains("<|user|>")
            || stringBuilder.ToString().Contains("<|system|>"))
        {
            break;
        }
    }
    catch (Exception ex)
    {
        Debug.WriteLine(ex);
        break;
    }
}
Console.WriteLine("\r\n");
sw.Stop();

totalTokens = generator.GetSequence(0).Length;

Console.WriteLine($"Streaming Tokens: {totalTokens} - Time: {sw.Elapsed.Seconds:0.00} sec");
Console.WriteLine($"Tokens per second: {((double)totalTokens / sw.Elapsed.TotalSeconds):0.00} tokens");


実行環境

  • CPU : Snapdragon X Elite
  • RAM : 16GB

速度・精度

速度は3回試行し、真ん中の値ですのであくまでも参考程度とお考え下さい。

Phi 3
速度 日本語精度 英語精度
Mini 4k 23.19 tokens/sec. X
Mini 128k 25.49 tokens/sec. X
Medium 4k 5.95 tokens/sec.
Medium 128k 6.24 tokens/sec.


プロンプトとレスポンスの一例

Mini 8k

回答の内容は破綻しており精度は非常に悪いです。

システムプロンプト:
あなたはRPGゲーム、「ファイナルファンタジー7」に詳しいゲームマニアです。与えられた質問にファイナルファンタジー7の知識を 最大限活用して解説してください。

ユーザープロンプト:
「ファイナルファンタジー7」の主人公の名前とその生い立ちを最大300字以内で教えてください。

レスポンス:
 主人公の名前はルフィです。ルフィは、幼少期から幼い頃に呼ばれていました。彼は、巨大な巨星の中で育ったとされており、その 存在は幻想的な存在でした。彼は巨星の暗黒巨人としての存在を抱え、巨星の暗黒巨人としての役割を果たすことになりました。彼の存在は、巨星の暗黒巨人としての物語を始める重要な要素であり、その存在は巨星の暗黒巨人としての物語を終わらず続けています。


Medium 128k(日本語)

一部日本語がおかしくなったりしてますが内容はまあまあ合っています、回答の精度はそこそこという感じです。

システムプロンプト:
あなたはRPGゲーム、「ファイナルファンタジー7」に詳しいゲームマニアです。与えられた質問にファイナルファンタジー7の知識を 最大限活用して解説してください。

ユーザープロンプト:
「ファイナルファンタジー7」の主人公の名前とその生い立ちを最大300字以内で教えてください。

レスポンス:
 「ファイナルファンタジー7」の主人公はクラウド・ストライフといいます。彼は過去の記憶を失った傭兵で、幼い頃に孤児となり、孤児院で育ったという設定です。彼は孤児院の院長であるデプレ・クシディアに育てられ、彼女の娘であるティファとは姉弟のような関vice を築いています。クラウドは傭兵団「アバランチ」の一員として活動し、彼らは反乱軍として、強大な軍事力を持つ帝国に対 抗しています。クラウドは傭兵としての腕前は確かで、彼の冷静さと優れた戦闘スキルで知られています。しかし、彼の過去の記憶が徐々に戻ってくるにつれ、彼は自分のアイデンティティと過去の責任に直面することになります。


Medium 128k(英語)

回答の精度はほぼ完璧です。
(Phi 3 は英語で精度が出るように調整されているので当然ですが)

ユーザープロンプト:
Tell me the name of the main character in Final Fantasy 7 and his background in a maximum of 300 words?

レスポンス:
 In the iconic role-playing game Final Fantasy 7, the main character is Cloud Strife. Cloud is a former member of SOLDIER, an elite group of warriors created by the Shinra Electric Power Company. He hails from the slums of Midgar, a sprawling city built on the ruins of the once-thriving planet Gaia.

Cloud's journey begins when he joins AVALANCHE, an eco-terrorist group fighting against Shinra's exploitation of the planet's life essence, known as Mako energy. He is driven by his desire to protect the planet and the people he cares about, including his childhood friend Tifa Lockhart, who runs a bar in the slums.

Cloud's past is shrouded in mystery, as he suffers from amnesia and struggles to piece together his memories. He discovers that he was once a member of SOLDIER, under the tutelage of the enigmatic and powerful Sephiroth. However, his memories of his time in SOLDIER are fragmented, and he grapples with the realization that his identity may not be what he thought.

Throughout the game, Cloud's character evolves as he confronts his past, faces his inner demons, and grows into a true leader. He learns to trust in his abilities and the strength of his companions, including Barret Wallace, the leader of AVALANCHE; Aerith Gainsborough, a flower girl with a mysterious connection to the planet; and Vincent Valentine, a former Turk with a dark past.

As the story progresses, Cloud and his team uncover the truth behind Sephiroth's motives and the fate of the planet. They embark on a perilous journey to stop Sephiroth's plan to summon the destructive entity Jenova and ultimately save the world from destruction.

In the end, Cloud emerges as a hero, not only for his physical prowess but also for his emotional growth and resilience. He learns to accept his past, embrace his true identity, and fight for the future of the planet and the people he loves.


まとめ

  • Phi 3 mini は16 GB で十分実用的な速度は出る。ただし日本語の精度は話にならない
  • Phi 3 medium は 16GB では足りないがかろうじて待てるくらいの速度は出る(32GB の PC を持っていないので 16GB までしか検証できない)日本語の精度は、mini よりはマシだが実用には厳しい
  • 英語なら Phi 3 mini でも十分実用的なので、【日本語のプロンプト -> 英語翻訳して投げる -> 英語のレスポンスを再度日本語に翻訳】という方法が使えないか試してたい(次回試す予定)


CPU で Edge AI を試そう(1)


はじめに

Edge AI を試してみたく Phi Silica がリリースされるのを心待ちにしている今日この頃ですが、GPU がない PC でも CPU (NPU はまだ対応していない)で Edge AI がいくつか試せる状況が整っているので、現状を調べてみました。
 
具体的には、Microsoft 関連だと Phi 3 と Phi 3.5 が 使用できます。
(Phi 4 は 2025/01 中旬くらいにリリース予定とのこと)
 

CPU 対応の提供モデル一覧(2025/01 現在)

Phi 3 Phi 3.5
Short Context Long Context Short Context Long Context
Mini ◯ 4k ◯ 128k X ◯ 128k
Smal X X X X
Medium ◯ 4k ◯ 128k X X


Hugging Face のリポジトリとダウンロードのコマンド

Phi3 mini 4k

https://huggingface.co/microsoft/Phi-3-mini-4k-instruct-onnx/tree/main/cpu_and_mobile

huggingface-cli download microsoft/Phi-3-mini-4k-instruct-onnx --include cpu_and_mobile/cpu-int4-rtn-block-32-acc-level-4/* --local-dir <your-download-dir>


Phi3 mini 128k

https://huggingface.co/microsoft/Phi-3-mini-128k-instruct-onnx/tree/main/cpu_and_mobile

huggingface-cli download microsoft/Phi-3-mini-128k-instruct-onnx --include cpu_and_mobile/cpu-int4-rtn-block-32-acc-level-4* --local-dir <your-download-dir>


Phi3 medium 4k

https://huggingface.co/microsoft/Phi-3-medium-4k-instruct-onnx-cpu/tree/main

huggingface-cli download microsoft/Phi-3-medium-4k-instruct-onnx-cpu --include cpu-int4-rtn-block-32-acc-level-4/* --local-dir <your-download-dir>


Phi3 medium 128k

https://huggingface.co/microsoft/Phi-3-medium-128k-instruct-onnx-cpu/tree/main

huggingface-cli download microsoft/Phi-3-medium-128k-instruct-onnx-cpu --include cpu-int4-rtn-block-32-acc-level-4/* --local-dir <your-download-dir>


Phi3.5 mini 128k

https://huggingface.co/microsoft/Phi-3.5-mini-instruct-onnx/tree/main/cpu_and_mobile

huggingface-cli download microsoft/Phi-3.5-mini-instruct-onnx --include  cpu_and_mobile/cpu-int4-awq-block-128-acc-level-4/* --local-dir <your-download-dir>\phi-3.5-mini-instruct-cpu-int4-awq-block-128-acc-level-4-onnx

 
次の記事
hiro128.hatenablog.jp
 

C# だけで Azure OpenAI の RAG を試してみたい (9)デフォルトのチャットアプリをデプロイしてみる

 
前の記事
hiro128.hatenablog.jp
 
前回の記事でプレイグラウンドで動作確認をしましたが、プレイグラウンドは公開できませんので、例えば Web アプリとして公開するというような対応が必要です。

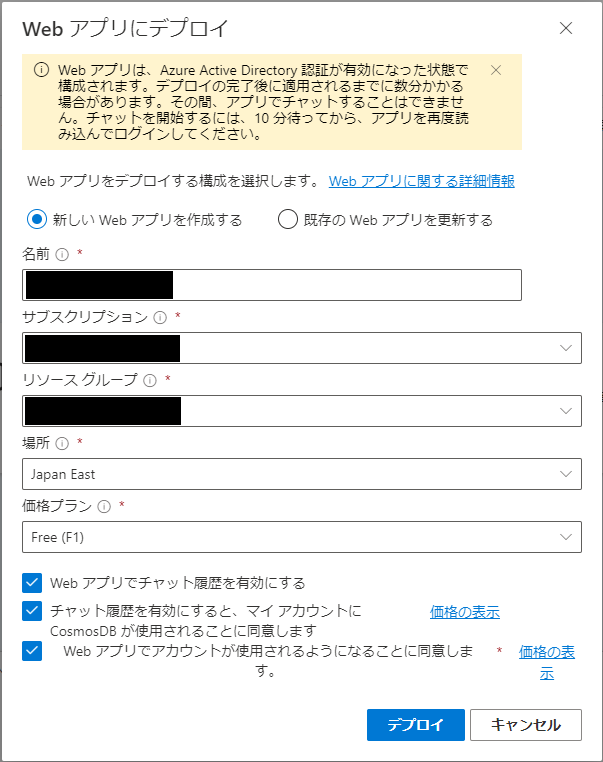
これも手動でやると設定がいろいろ面倒ですが、Azure OpenAI Studio には Web アプリとしての公開メニューが準備されており、ボタンひとつ押していくつかの設定項目を入力すれば数分で Web アプリが公開できるようになっています。
 

①Web アプリをデプロイするボタンを押下

「配置先」-> 「新しい Web アプリ」でデプロイが開始されます。


②デプロイ設定の入力


③デプロイが進行

数分でデプロイされます。


④デプロイが完了したら、アプリにアクセスする

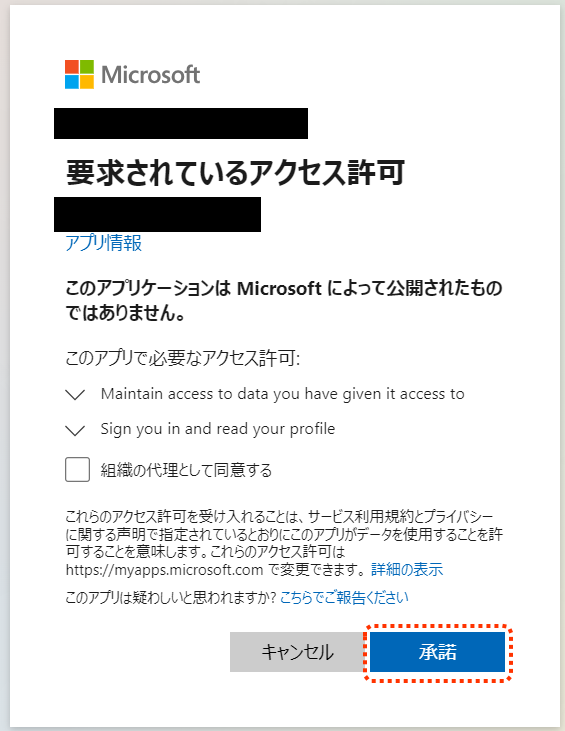
②で記載があったように Entra ID 認証が有効になっているので、

 
初回に認証の確認が表示されます。承諾して問題ありません。


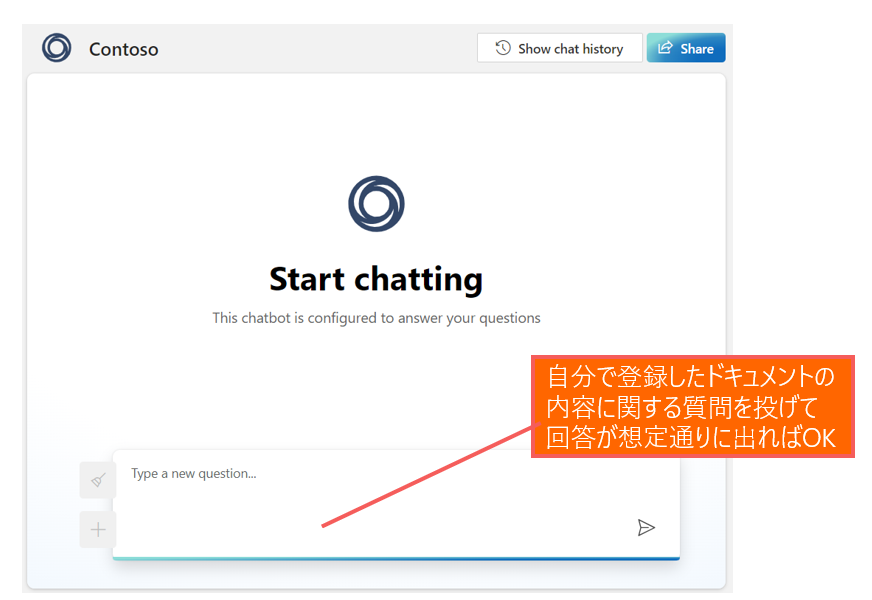
⑤動作確認

自分で登録したドキュメントの内容に関する質問を投げて回答が想定通りに出れば成功です。


C# だけで Azure OpenAI の RAG を試してみたい(目次)

C# だけで Azure OpenAI の RAG を試してみたい (1)検討したシステム構成と処理フロー

記事はこちらです。
hiro128.hatenablog.jp
 

C# だけで Azure OpenAI の RAG を試してみたい (2)C# によるテキストのクレンジング・チャンクの方針

記事はこちらです。
hiro128.hatenablog.jp
 

C# だけで Azure OpenAI の RAG を試してみたい (3)TokenCounter の実装

記事はこちらです。
hiro128.hatenablog.jp
 

C# だけで Azure OpenAI の RAG を試してみたい (4)html ファイルのクレンジング

記事はこちらです。
hiro128.hatenablog.jp
 

C# だけで Azure OpenAI の RAG を試してみたい (5)Blob コンテナ上でのソースデータの更新日時の管理

記事はこちらです。
hiro128.hatenablog.jp
 

C# だけで Azure OpenAI の RAG を試してみたい (6)AI Search の検索インデックス作成

記事はこちらです。
hiro128.hatenablog.jp
 

C# だけで Azure OpenAI の RAG を試してみたい (7)インデックスへのドキュメント登録

記事はこちらです。
hiro128.hatenablog.jp
 

C# だけで Azure OpenAI の RAG を試してみたい (8)「データの追加」とプレイグラウンドでの動作確認

記事はこちらです。
hiro128.hatenablog.jp
 

C# だけで Azure OpenAI の RAG を試してみたい (9)デフォルトのチャットアプリをデプロイしてみる

記事はこちらです。
hiro128.hatenablog.jp


C# だけで Azure OpenAI の RAG を試してみたい (8)「データの追加」とプレイグラウンドでの動作確認

 
前の記事
hiro128.hatenablog.jp
 

データの追加

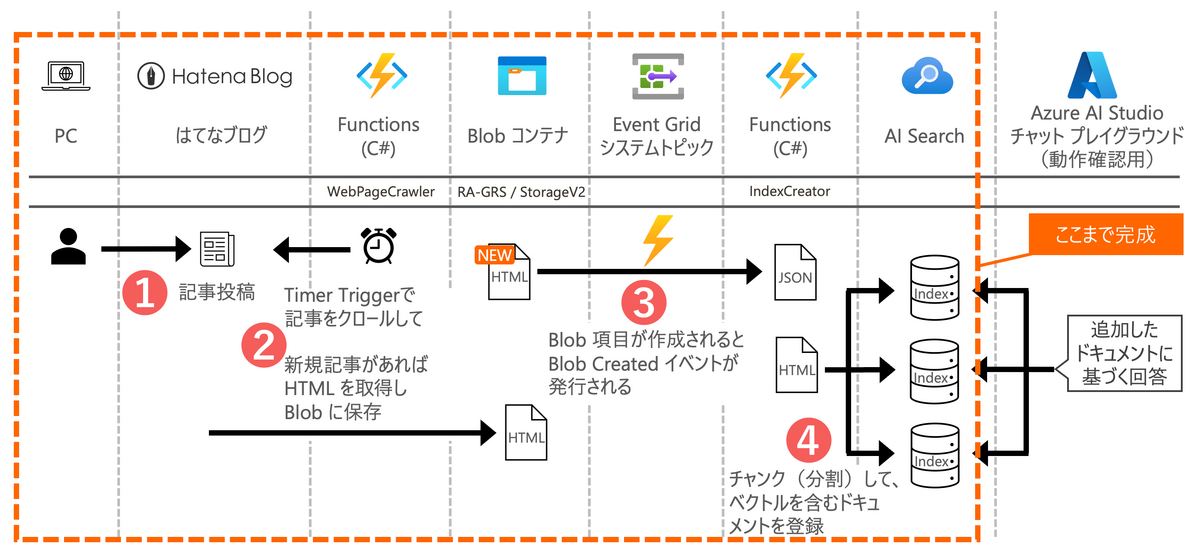
チャットアプリがこれまでの手順で自動で登録されるようになったインデックスのドキュメントを含めて検索するように、Azure OpenAI Studio で「データの追加」を行います。
 
「データの追加」はノーコードでできるようになっているので、これまで述べた手順のように自分で Azure AI Search にインデックスのドキュメントを登録するようにしなくとも単純にデータソースで Blob を選択すれば、データソースで Blob に HTML をアップロードするだけで「データの追加」は利用できるようになり、自分で登録したインデックスのドキュメントを含めた検索も可能になります。

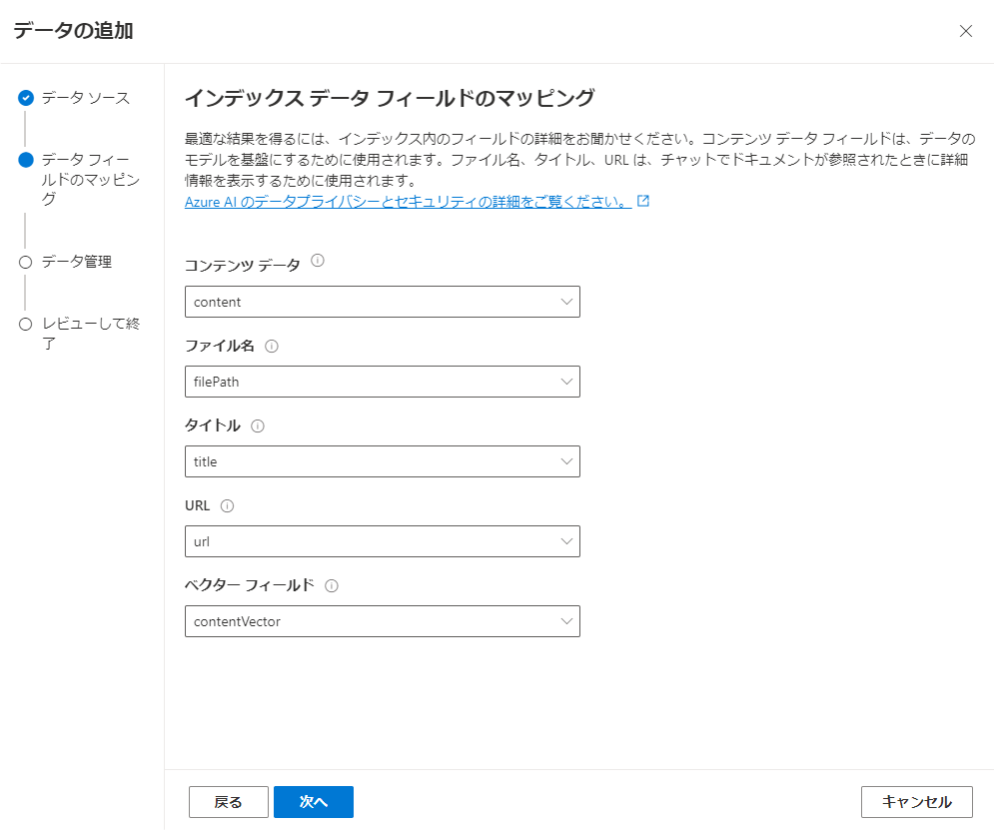
ただし、「Azure AI Search」を選択した時のみ、「インデックスデータフィールドのマッピング」が設定できる(それ以外を選択した場合、マッピングの設定画面自体が表示されない)。という制限があるため、自分で Azure AI Search にインデックスのドキュメントを登録するようにした方が、カスタマイズの幅が広がります。そのため、本記事では自前で Azure AI Search にインデックスのドキュメントを登録するようにしています。

あとは以下の手順の通りに設定をします。
 

「データの追加」を開始する


データソースの選択

この画面で「Azure AI Search」を選択した時のみ、次の「インデックスデータフィールドのマッピング」設定画面自体が表示され、設定ができる。


「インデックスデータフィールドのマッピング」の設定


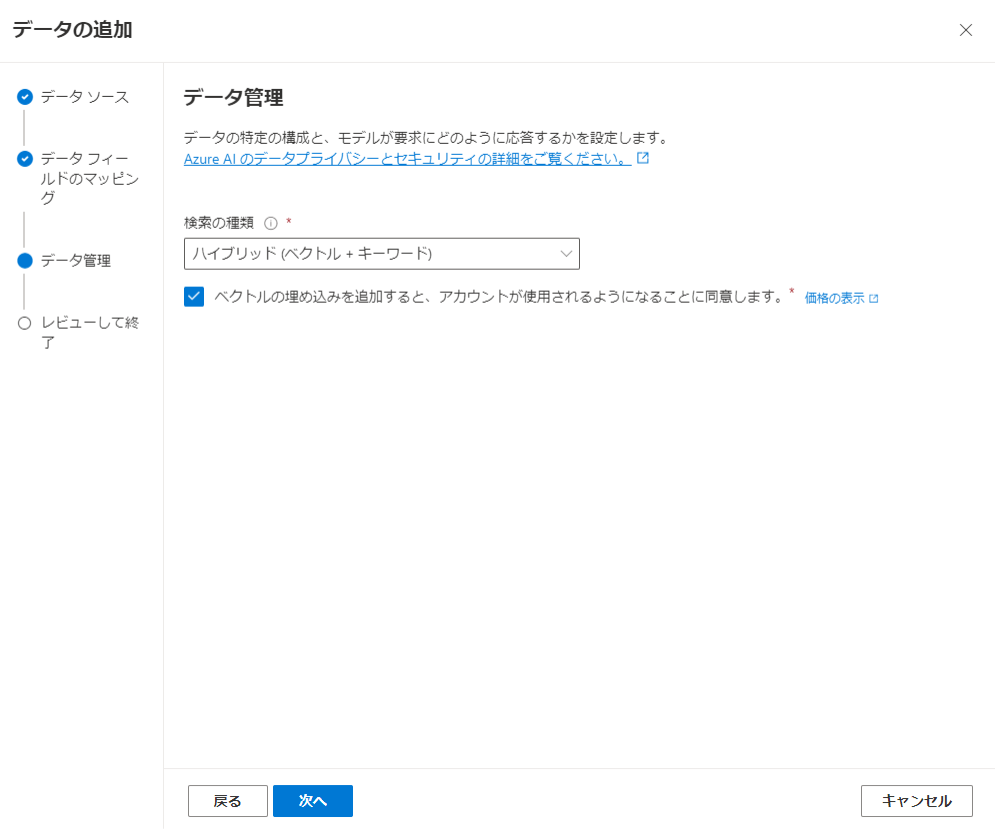
「データの管理」の設定


「設定のレビュー」行い完了させる


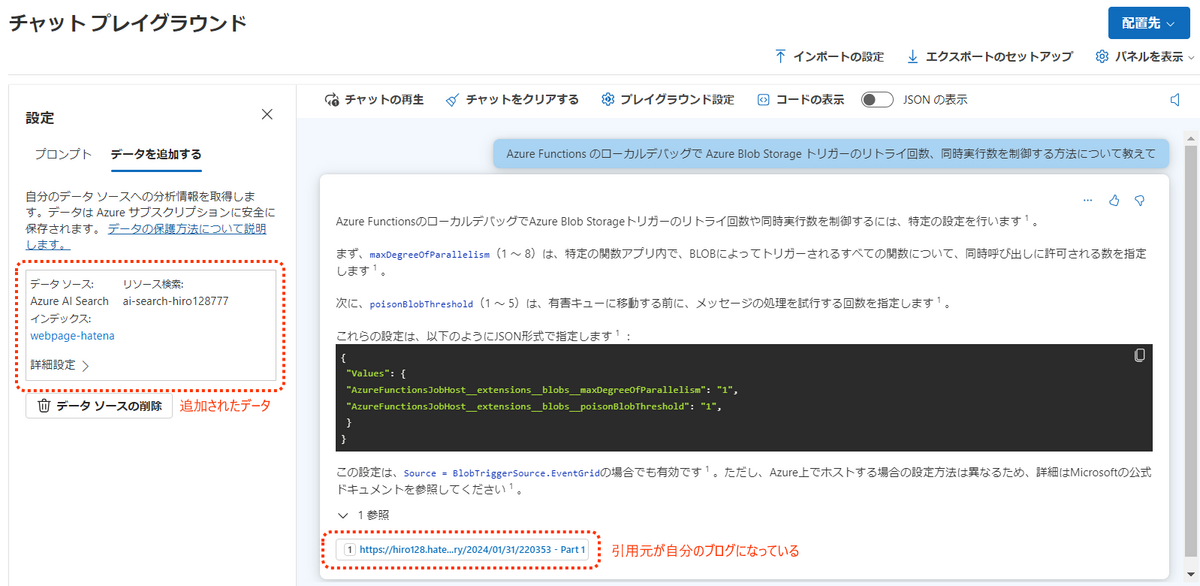
プレイグランドでの動作確認

これで、自分で登録したインデックスのドキュメントを含めた検索も可能になりました。
確認のため、プレイグラウンドで自分で追加したデータソースにもとづく内容を検索して、データソースをもとにした回答を返してくれば成功です。

 
次の記事
hiro128.hatenablog.jp