個人的なメモ

Tomohiro Suzuki @hiro128_777 のブログです。Microsoft MVP for Developer Technologies 2017- 本ブログと所属組織の公式見解は関係ございません。

Xamarin + Cocos Sharp で iOS, Android 対応のゲームを開発する手順 (13) 当たり判定① 当たり判定を検出できるようにする。

今回は自機が敵キャラに当たった時の当たり判定を実装します。

当たり判定を行なうには CCRect クラスの IntersectsRect メソッドを利用します。

public bool IntersectsRect(CCRect rect);

CCRect が引数に与えられた CCRect と重なっている場合、true を返します。

ですが、この処理を画面上の全ての敵キャラに対し、1/10秒といったようなインターバルで行なってしまうと、大きな負荷がかかってしまいます。
そこで、一般的には自分の近くに居る敵キャラにだけ当たり判定を行ないます。

具体的には、画面をいくつかのエリアに分割し、自機と敵キャラが同じエリアに居た場合のみ、当たり判定を行います。

今回は、下記の様に画面を15のエリアに分割します。

f:id:hiro128:20160914210709p:plain

では、最初に自機と敵キャラが今どのエリアに居るのかを簡単に判別できるような機能を追加します。

CocosSharpGameSample.Core プロジェクトに ScreenArea.cs を追加します。

f:id:hiro128:20160914210722p:plain

各エリアをあらわす enum を作成します。

using System;

namespace CocosSharpGameSample.Core
{
	public enum ScreenArea
	{
		UnKnown,
		Area00,
		Area01,
		Area02,
		Area10,
		Area11,
		Area12,
		Area20,
		Area21,
		Area22,
		Area30,
		Area31,
		Area32,
		Area40,
		Area41,
		Area42
	}
}

次に、CCSprite を拡張して現在のエリアを取得できるプロパティを追加します。

CocosSharpGameSample.Core プロジェクトに ExtendedCCSprite.cs を追加します。

f:id:hiro128:20160914210732p:plain

座標ごとのエリアを返すプロパティ ScreenArea を追加します。

using CocosSharp;

namespace CocosSharpGameSample.Core
{
	public class ExtendedCCSprite : CCSprite
	{
		public ExtendedCCSprite(string fileName, CCRect? texRectInPixels = null)
			: base(fileName, texRectInPixels)
		{ 
		}

		public ScreenArea ScreenArea
		{
			get
			{
				if (this.Position.X >= 0 && this.Position.X < 240 && this.Position.Y >= 1024 && this.Position.Y < 1280)
				{
					return Core.ScreenArea.Area00;
				}
				else if (this.Position.X >= 240 && this.Position.X < 480 && this.Position.Y >= 1024 && this.Position.Y < 1280)
				{
					return Core.ScreenArea.Area01;
				}
				else if (this.Position.X >= 480 && this.Position.X < 720 && this.Position.Y >= 1024 && this.Position.Y < 1280)
				{
					return Core.ScreenArea.Area02;
				}
				else if (this.Position.X >= 0 && this.Position.X < 240 && this.Position.Y >= 768 && this.Position.Y < 1024)
				{
					return Core.ScreenArea.Area10;
				}
				else if (this.Position.X >= 240 && this.Position.X < 480 && this.Position.Y >= 768 && this.Position.Y < 1024)
				{
					return Core.ScreenArea.Area11;
				}
				else if (this.Position.X >= 480 && this.Position.X < 720 && this.Position.Y >= 768 && this.Position.Y < 1024)
				{
					return Core.ScreenArea.Area12;
				}
				else if (this.Position.X >= 0 && this.Position.X < 240 && this.Position.Y >= 512 && this.Position.Y < 768)
				{
					return Core.ScreenArea.Area20;
				}
				else if (this.Position.X >= 240 && this.Position.X < 480 && this.Position.Y >= 512 && this.Position.Y < 768)
				{
					return Core.ScreenArea.Area21;
				}
				else if (this.Position.X >= 480 && this.Position.X < 720 && this.Position.Y >= 512 && this.Position.Y < 768)
				{
					return Core.ScreenArea.Area22;
				}
				else if (this.Position.X >= 0 && this.Position.X < 240 && this.Position.Y >= 256 && this.Position.Y < 512)
				{
					return Core.ScreenArea.Area30;
				}
				else if (this.Position.X >= 240 && this.Position.X < 480 && this.Position.Y >= 256 && this.Position.Y < 512)
				{
					return Core.ScreenArea.Area31;
				}
				else if (this.Position.X >= 480 && this.Position.X < 720 && this.Position.Y >= 256 && this.Position.Y < 512)
				{
					return Core.ScreenArea.Area32;
				}
				else if (this.Position.X >= 0 && this.Position.X < 240 && this.Position.Y >= 0 && this.Position.Y < 256)
				{
					return Core.ScreenArea.Area40;
				}
				else if (this.Position.X >= 240 && this.Position.X < 480 && this.Position.Y >= 0 && this.Position.Y < 256)
				{
					return Core.ScreenArea.Area41;
				}
				else if (this.Position.X >= 480 && this.Position.X < 720 && this.Position.Y >= 0 && this.Position.Y < 256)
				{
					return Core.ScreenArea.Area42;
				}
				return Core.ScreenArea.UnKnown;
			}
		}

	}
}

次に、CocosSharpGameSample.Core プロジェクトの GameLayer.cs に当たり判定の処理を追加していきます。

f:id:hiro128:20160914210757p:plain

まず、自機の参照を ExtendedCCSprite に変更し、当たり判定をキャンセルするかどうかを判定するフラグを追加します。

下記の部分を

public class GameLayer : LayerBase
{

	private CCNode player;

以下のように変更します。

public class GameLayer : LayerBase
{

	private ExtendedCCSprite player;
	private bool enableCollisionDetection = true;

	public bool EnableCollisionDetection
	{
		get { return this.enableCollisionDetection; }
		set { this.enableCollisionDetection = value; }
	}

当たり判定の処理は以下のような流れになります。

まず、ゲーム開始直後、リスタート直後、ステージクリア時、プレーヤーが画面上に居ない場合など当たり判定をキャンセルする場合はすぐに処理を抜けるようします。
また、当たり判定は四角の領域で行なうために、自機の中心部だけで行なわないと非常に厳しい当たり判定になってしまいますので、自機の中心部に実際の当たり判定領域を設定します。
上記で設定した当たり判定領域に対し、自機と敵キャラが同一エリアに居るときのみ、当たり判定を実施します。

当たり判定を行なうコードは以下のようになります。

private void DetectCollisions()
{
	// ゲーム開始直後、リスタート直後、ステージクリア時など、当たり判定をキャンセルする場合
	if(this.EnableCollisionDetection == false)
	{
		return;
	}
	// プレーヤーがやられてしまった後など、プレーヤーが画面上に居ない場合
	if (this.player == null)
	{
		return;
	}
	// 当たり判定領域をプレーヤー中心部分だけにする
	var rectPlayer = player.BoundingBox;
	var rectTrimedPlayer = new CCRect(
									rectPlayer.MidX - (GameSettings.PlayerWidth / 6), 
									rectPlayer.MidY - (GameSettings.PlayerHeight / 3), 
									GameSettings.PlayerWidth / 3, 
									GameSettings.PlayerHeight / 3);
	//// 実際の当たり判定領域の確認用コード(コメントを外すと実際の当たり判定領域を可視化できます。)
	//var acutualRect = new CCSprite();
	//acutualRect.TextureRectInPixels = rectTrimedPlayer;
	//acutualRect.Color = new CCColor3B(0, 255, 0);
	//acutualRect.Position = rectTrimedPlayer.LowerLeft;
	//acutualRect.Tag = 100000000;
	//this.RemoveChildByTag(100000000);
	//this.AddChild(acutualRect);

	// 当たり判定実施
	var enemies = new List<CCNode>();
	enemies.AddRange(this.GetChildrenByTag((int)NodeTag.Enemy));
	if (enemies.Count > 0)
	{
		foreach (var node in enemies)
		{
			// 同一エリア以外は当たり判定スキップ
			if (this.player.ScreenArea != ((ExtendedCCSprite)node).ScreenArea)
			{
				continue;
			}
			var rectEnemy = node.BoundingBox;
			if (rectTrimedPlayer.IntersectsRect(rectEnemy) == true)
			{
				this.EnableCollisionDetection = false;
				Debug.WriteLine("敵キャラに当たった!");
				break;
			}
		}
	}
}

当たり判定は 0.1 秒に1回行なうようスケジューラに登録します。

private void StartScheduling()
{
	this.Schedule(t => this.UpdatePlayer(), 0.02f);
	this.Schedule(t => this.RemoveOffScreenNodes(), 1.0f);
	this.Schedule(t => this.DetectCollisions(), 0.1f); // <-当たり判定スケジューラ登録
}

以上をまとめると、CocosSharpGameSample.Core プロジェクトの Layers/GameLayer.cs は以下の通りになります。

using System.Collections.Generic;
using System.Diagnostics;
using CocosSharp;

namespace CocosSharpGameSample.Core
{
	public class GameLayer : LayerBase
	{

		private ExtendedCCSprite player;
		private bool enableCollisionDetection = true;

		public bool EnableCollisionDetection
		{
			get { return this.enableCollisionDetection; }
			set { this.enableCollisionDetection = value; }
		}

		public GameLayer()
			: base()
		{
			var listener = new CCEventListenerTouchOneByOne();
			listener.OnTouchBegan = this.CCEventListener_TouchBegan;
			this.AddEventListener(listener, this);
		}

		protected bool CCEventListener_TouchBegan(CCTouch touch, CCEvent touchEvent)
		{
			Debug.WriteLine(this.ChildrenCount);
			// タッチした場所に敵キャラ配置
			var touchedLocation = touch.Location;
			// 画面の上部25%なら敵キャラ配置
			if (touchedLocation.Y > GameSettings.ScreenHeight * 3 / 4)
			{
				var addingEnemy = new ExtendedCCSprite("/Resources/Images/Character/Enemy/Enemy001.png", null);
				addingEnemy.Position = touchedLocation;
				addingEnemy.Tag = (int)NodeTag.Enemy;
				this.ApplyGoStraightFromTopDownAction(addingEnemy);
				this.AddChild(addingEnemy);
				return true;
			}
			return false;
		}

		// Y軸のみの移動で画面外まで行くアクションを適用
		public void ApplyGoStraightFromTopDownAction(CCNode enemy)
		{
			var destinationPoint = new CCPoint(enemy.PositionX, -100);
			var action = new CCMoveTo(8.0f, destinationPoint);
			enemy.RunAction(action);
		}

		// 画面外のNodeを除去
		public void RemoveOffScreenNodes()
		{
			foreach (var node in this.Children)
			{
				if (node.Position.Y < 0)
				{
					this.RemoveChild(node);
				}
			}
		}

		protected override void AddedToScene()
		{
			base.AddedToScene();
			// ゲーム画面の背景画像を配置
			var gameBackground = new CCSprite("/Resources/Images/Background/GameBackground.png", null);
			gameBackground.Position = new CCPoint(this.ContentSize.Center.X, this.ContentSize.Center.Y);
			AddChild(gameBackground);

			// 自機を配置
			this.AddPlayer();
			this.StartScheduling();
		}

		private void StartScheduling()
		{
			this.Schedule(t => this.UpdatePlayer(), 0.02f);
			this.Schedule(t => this.RemoveOffScreenNodes(), 1.0f);
			this.Schedule(t => this.DetectCollisions(), 0.1f);
		}

		private void AddPlayer()
		{
			this.player = new ExtendedCCSprite("/Resources/Images/Character/Player/Player.png", null);
			this.player.Position = new CCPoint(this.ContentSize.Center.X, this.ContentSize.Center.Y);
			this.AddChild(this.player);
		}

		private void UpdatePlayer()
		{
			this.player.PositionX = this.player.PositionX;
			this.player.PositionY = this.player.PositionY;

			// 画面からはみ出ないように、位置の値の上限、下限を設定します。
			// 左
			if (this.player.PositionX < 0 + GameSettings.PlayerWidth)
			{
				this.player.PositionX = 0 + GameSettings.PlayerWidth;
			}
			// 右
			if (this.player.PositionX > GameSettings.ScreenWidth - GameSettings.PlayerWidth)
			{
				this.player.PositionX = GameSettings.ScreenWidth - GameSettings.PlayerWidth;
			}
			// 下
			if (this.player.PositionY < 0 + GameSettings.PlayerHeight)
			{
				this.player.PositionY = 0 + GameSettings.PlayerHeight;
			}
			// 上
			if (this.player.PositionY > GameSettings.ScreenHeight - GameSettings.PlayerHeight)
			{
				this.player.PositionY = GameSettings.ScreenHeight - GameSettings.PlayerHeight;
			}
		}

		private void DetectCollisions()
		{
			// ゲーム開始直後、リスタート直後、ステージクリア時など、当たり判定をキャンセルする場合
			if (this.EnableCollisionDetection == false)
			{
				return;
			}
			// プレーヤーがやられてしまった後など、プレーヤーが画面上に居ない場合
			if (this.player == null)
			{
				return;
			}
			// 当たり判定領域をプレーヤー中心部分だけにする
			var rectPlayer = player.BoundingBox;
			var rectTrimedPlayer = new CCRect(
											rectPlayer.MidX - (GameSettings.PlayerWidth / 6),
											rectPlayer.MidY - (GameSettings.PlayerHeight / 3),
											GameSettings.PlayerWidth / 3,
											GameSettings.PlayerHeight / 3);
			//// 実際の当たり判定領域の確認用コード(コメントを外すと実際の当たり判定領域を可視化できます。)
			//var acutualRect = new CCSprite();
			//acutualRect.TextureRectInPixels = rectTrimedPlayer;
			//acutualRect.Color = new CCColor3B(0, 255, 0);
			//acutualRect.Position = rectTrimedPlayer.LowerLeft;
			//acutualRect.Tag = 100000000;
			//this.RemoveChildByTag(100000000);
			//this.AddChild(acutualRect);

			// 当たり判定実施
			var enemies = new List<CCNode>();
			enemies.AddRange(this.GetChildrenByTag((int)NodeTag.Enemy));
			if (enemies.Count > 0)
			{
				foreach (var node in enemies)
				{
					// 同一エリア以外は当たり判定スキップ
					if (this.player.ScreenArea != ((ExtendedCCSprite)node).ScreenArea)
					{
						continue;
					}
					var rectEnemy = node.BoundingBox;
					if (rectTrimedPlayer.IntersectsRect(rectEnemy) == true)
					{
						this.EnableCollisionDetection = false;
						Debug.WriteLine("敵キャラに当たった!");
						break;
					}
				}
			}
		}

	}
}

以上で、デバッグ出力に当たり判定が出力できるようになりました。

f:id:hiro128:20160914210858p:plain

今回は、ここまでです。

何かご質問などございましたらコメント頂ければご回答させていただきますのでお気軽にどうぞ!

また、間違い等ございましたら、ご指摘頂ければ幸いです。

Xamarin + Cocos Sharp で iOS, Android 対応のゲームを開発する手順 (12) 敵キャラを移動させ、画面外に出たら消去する。

今回は画面をタッチして出した敵キャラを移動させ、画面外に出たら消去します。

具体的には、画面タッチで出現させた敵キャラは、横移動はなしで画面の下に移動し、画面外に消えていく動きを作成します。

キャラを移動する場合は、CCMoveTo で移動のアクションを作成し、Node の RunAction メソッドで動作開始となります。
※CCMoveTo はNodeの移動のアクションをカプセル化したオブジェクトです。

まずは、CCMoveTo に移動に必要な時間と移動後の目的地の座標を与えてインスタンスを作成します。

移動後の目的地の座標ですが Cocos Sharp の座標は左下が原点で(0, 0)なので、まっすぐに画面の下に移動したい場合、目的地の座標は、(敵キャラの現在のX座標, -100)のようになります。

次にそのアクションを Node の RunAction で動作開始させます。

// Y軸のみの移動で画面外まで行くアクションを適用
public void ApplyGoStraightFromTopDownAction(CCNode enemy)
{
	var destinationPoint = new CCPoint(enemy.PositionX, -100);
	var action = new CCMoveTo(8.0f, destinationPoint);
	enemy.RunAction(action);
}

配置した敵キャラに上記のアクションを適用します。

protected bool CCEventListener_TouchBegan(CCTouch touch, CCEvent touchEvent)
{
	// タッチした場所に敵キャラ配置
	var touchedLocation = touch.Location;
	// 画面の上部25%なら敵キャラ配置
	if (touchedLocation.Y > GameSettings.ScreenHeight * 3 / 4)
	{
		var addingEnemy = new CCSprite("/Resources/Images/Character/Enemy/Enemy001.png", null);
		addingEnemy.Position = touchedLocation;
		addingEnemy.Tag = (int)NodeTag.Enemy;

		// 敵キャラにアクションを適用
		this.ApplyGoStraightFromTopDownAction(addingEnemy);

		this.AddChild(addingEnemy);
		return true;
	}
	return false;
}

このままだと、画面外に移動してしまった敵キャラがどんどん溜まっていってしまうので、画面外に出た敵キャラは定期的に消去します。

画面外かどうかはY座標の値で判定します。

// 画面外のNodeを除去
public void RemoveOffScreenNodes()
{
	foreach (var node in this.Children)
	{
		if (node.Position.Y < 0)
		{
			this.RemoveChild(node);
		}
	}
}

消去処理を定期的に実行します。

private void StartScheduling()
{
	this.Schedule(t => this.UpdatePlayer(), 0.02f);
	this.Schedule(t => this.RemoveOffScreenNodes(), 1.0f);// 定期的に消去
}

以上をまとめると、CocosSharpGameSample.Core プロジェクトの Layers/GameLayer.cs は以下の通りになります。

using System;
using System.Diagnostics;
using CocosSharp;

namespace CocosSharpGameSample.Core
{
	public class GameLayer : LayerBase
	{

		private CCNode player;

		public GameLayer()
			: base()
		{
			var listener = new CCEventListenerTouchOneByOne();
			listener.OnTouchBegan = this.CCEventListener_TouchBegan;
			this.AddEventListener(listener, this);
		}

		protected bool CCEventListener_TouchBegan(CCTouch touch, CCEvent touchEvent)
		{
			Debug.WriteLine(this.ChildrenCount);
			// タッチした場所に敵キャラ配置
			var touchedLocation = touch.Location;
			// 画面の上部25%なら敵キャラ配置
			if (touchedLocation.Y > GameSettings.ScreenHeight * 3 / 4)
			{
				var addingEnemy = new CCSprite("/Resources/Images/Character/Enemy/Enemy001.png", null);
				addingEnemy.Position = touchedLocation;
				addingEnemy.Tag = (int)NodeTag.Enemy;
				this.ApplyGoStraightFromTopDownAction(addingEnemy);
				this.AddChild(addingEnemy);
				return true;
			}
			return false;
		}

		// Y軸のみの移動で画面外まで行くアクションを適用
		public void ApplyGoStraightFromTopDownAction(CCNode enemy)
		{
			CCPoint destinationPoint = new CCPoint(enemy.PositionX, -100);
			CCMoveTo action = new CCMoveTo(8.0f, destinationPoint);
			enemy.RunAction(action);
		}

		// 画面外のNodeを除去
		public void RemoveOffScreenNodes()
		{
			foreach (var node in this.Children)
			{
				if (node.Position.Y < 0)
				{
					this.RemoveChild(node);
				}
			}
		}

		protected override void AddedToScene()
		{
			base.AddedToScene();
			// ゲーム画面の背景画像を配置
			var gameBackground = new CCSprite("/Resources/Images/Background/GameBackground.png", null);
			gameBackground.Position = new CCPoint(this.ContentSize.Center.X, this.ContentSize.Center.Y);
			AddChild(gameBackground);

			// 自機を配置
			this.AddPlayer();
			this.StartScheduling();
		}

		private void StartScheduling()
		{
			this.Schedule(t => this.UpdatePlayer(), 0.02f);
			this.Schedule(t => this.RemoveOffScreenNodes(), 1.0f);
		}

		private void AddPlayer()
		{
			this.player = new CCSprite("/Resources/Images/Character/Player/Player.png", null);
			this.player.Position = new CCPoint(this.ContentSize.Center.X, this.ContentSize.Center.Y);
			this.AddChild(this.player);
		}

		private void UpdatePlayer()
		{
			this.player.PositionX = this.player.PositionX;
			this.player.PositionY = this.player.PositionY;

			// 画面からはみ出ないように、位置の値の上限、下限を設定します。
			// 左
			if (this.player.PositionX < 0 + GameSettings.PlayerWidth)
			{
				this.player.PositionX = 0 + GameSettings.PlayerWidth;
			}
			// 右
			if (this.player.PositionX > GameSettings.ScreenWidth - GameSettings.PlayerWidth)
			{
				this.player.PositionX = GameSettings.ScreenWidth - GameSettings.PlayerWidth;
			}
			// 下
			if (this.player.PositionY < 0 + GameSettings.PlayerHeight)
			{
				this.player.PositionY = 0 + GameSettings.PlayerHeight;
			}
			// 上
			if (this.player.PositionY > GameSettings.ScreenHeight - GameSettings.PlayerHeight)
			{
				this.player.PositionY = GameSettings.ScreenHeight - GameSettings.PlayerHeight;
			}
		}

	}
}

以上で、タッチして出現した敵キャラが画面の下に消えていくようになりました。

f:id:hiro128:20160827170933g:plain

今回は、ここまでです。

何かご質問などございましたらコメント頂ければご回答させていただきますのでお気軽にどうぞ!

Xamarin + Cocos Sharp で iOS, Android 対応のゲームを開発する手順 (11) タッチした場所に敵キャラを出す

今回は画面をタッチした場所に敵キャラを出します。
なお、敵キャラが出るのは画面の上部 1/4 をタッチした場合のみです。

まずは、敵キャラの画像をプロジェクトに追加します。

CocosSharpGameSample.iOS プロジェクトに敵キャラの画像を追加します。

f:id:hiro128:20160825145014p:plain

Resources/Images/Character/Enemy/Enemy001.png

f:id:hiro128:20160825145035p:plain

CocosSharpGameSample.Android プロジェクトに敵キャラの画像を追加します。

Assets/Images/Character/Enemy/Enemy001.png

f:id:hiro128:20160825145058p:plain

次にタッチした場所に敵キャラを配置します。

最初にタッチイベントのリスナーを作成し、ゲーム画面の CCLayer に追加します。
イベントハンドラはリスナーの OnTouchBegan プロパティにデリゲートとして登録します。

public GameLayer()
	: base()
{
	var listener = new CCEventListenerTouchOneByOne();
	listener.OnTouchBegan = this.CCEventListener_TouchBegan;
	this.AddEventListener(listener, this);
}

次に OnTouchBegan イベントハンドラを定義します。
OnTouchBegan イベントハンドラ内でタッチした位置を判定し、敵キャラ画面上に配置します。

OnTouchBegan イベントハンドラはラムダ式で書いても良いですが、ゲームの場合、ラムダ式の中身が大きくなってしまい可読性が下がりますので今回は別途定義しています。

OnTouchBegan の戻り値が true の場合、このイベント自体を処理し、その後の OnTouchEnded, OnTouchMoved, なども処理されます。
OnTouchBegan の戻り値が false の場合、このイベント自体が無視され、その後の OnTouchEnded, OnTouchMoved, なども無視されます。

protected bool CCEventListener_TouchBegan(CCTouch touch, CCEvent touchEvent)
{
	// タッチした場所に敵キャラ配置
	var touchedLocation = touch.Location;
	// 画面の上部25%なら敵キャラ配置
	if (touchedLocation.Y > GameSettings.ScreenHeight * 3 / 4)
	{
		var addingEnemy = new CCSprite("/Resources/Images/Character/Enemy/Enemy001.png", null);
		addingEnemy.Position = touchedLocation;
		addingEnemy.Tag = (int)NodeTag.Enemy;
		this.AddChild(addingEnemy);
		return true;
	}
	return false;
}

以上をまとめると、CocosSharpGameSample.Core プロジェクトの Layers/GameLayer.cs は以下の通りになります。

using System;
using System.Diagnostics;
using CocosSharp;

namespace CocosSharpGameSample.Core
{
	public class GameLayer : LayerBase
	{

		private CCNode player;

		public GameLayer()
			: base()
		{
			var listener = new CCEventListenerTouchOneByOne();
			listener.OnTouchBegan = this.CCEventListener_TouchBegan;
			this.AddEventListener(listener, this);
		}

		protected bool CCEventListener_TouchBegan(CCTouch touch, CCEvent touchEvent)
		{
			// タッチした場所に敵キャラ配置
			var touchedLocation = touch.Location;
			// 画面の上部25%なら敵キャラ配置
			if (touchedLocation.Y > GameSettings.ScreenHeight * 3 / 4)
			{
				var addingEnemy = new CCSprite("/Resources/Images/Character/Enemy/Enemy001.png", null);
				addingEnemy.Position = touchedLocation;
				addingEnemy.Tag = (int)NodeTag.Enemy;
				this.AddChild(addingEnemy);
				return true;
			}
			return false;
		}

		protected override void AddedToScene()
		{
			base.AddedToScene();
			// ゲーム画面の背景画像を配置
			var gameBackground = new CCSprite("/Resources/Images/Background/GameBackground.png", null);
			gameBackground.Position = new CCPoint(this.ContentSize.Center.X, this.ContentSize.Center.Y);
			AddChild(gameBackground);

			// 自機を配置
			this.AddPlayer();

			this.StartScheduling();
		}

		private void StartScheduling()
		{
			this.Schedule(t => this.UpdatePlayer(), 0.02f);
		}

		private void AddPlayer()
		{
			this.player = new CCSprite("/Resources/Images/Character/Player/Player.png", null);
			this.player.Position = new CCPoint(this.ContentSize.Center.X, this.ContentSize.Center.Y);
			this.AddChild(this.player);
		}

		private void UpdatePlayer()
		{
			this.player.PositionX = this.player.PositionX;
			this.player.PositionY = this.player.PositionY;

			// 画面からはみ出ないように、位置の値の上限、下限を設定します。
			// 左
			if (this.player.PositionX < 0 + GameSettings.PlayerWidth)
			{
				this.player.PositionX = 0 + GameSettings.PlayerWidth;
			}
			// 右
			if (this.player.PositionX > GameSettings.ScreenWidth - GameSettings.PlayerWidth)
			{
				this.player.PositionX = GameSettings.ScreenWidth - GameSettings.PlayerWidth;
			}
			// 下
			if (this.player.PositionY < 0 + GameSettings.PlayerHeight)
			{
				this.player.PositionY = 0 + GameSettings.PlayerHeight;
			}
			// 上
			if (this.player.PositionY > GameSettings.ScreenHeight - GameSettings.PlayerHeight)
			{
				this.player.PositionY = GameSettings.ScreenHeight - GameSettings.PlayerHeight;
			}
		}

	}
}

以上で、タッチした場所に敵キャラが出現するようになりました。

f:id:hiro128:20160825145217p:plain

今回は、ここまでです。

何かご質問などございましたらコメント頂ければご回答させていただきますのでお気軽にどうぞ!

Xamarin + Cocos Sharp で iOS, Android 対応のゲームを開発する手順 (10) サンプルゲームの概要

ここまで、Cocos Sharp の基本をご説明してきましたが、ここから実際にサンプルゲームを作成していき、より実戦に即したゲーム作成についてご説明していきます。

ゲームの概要

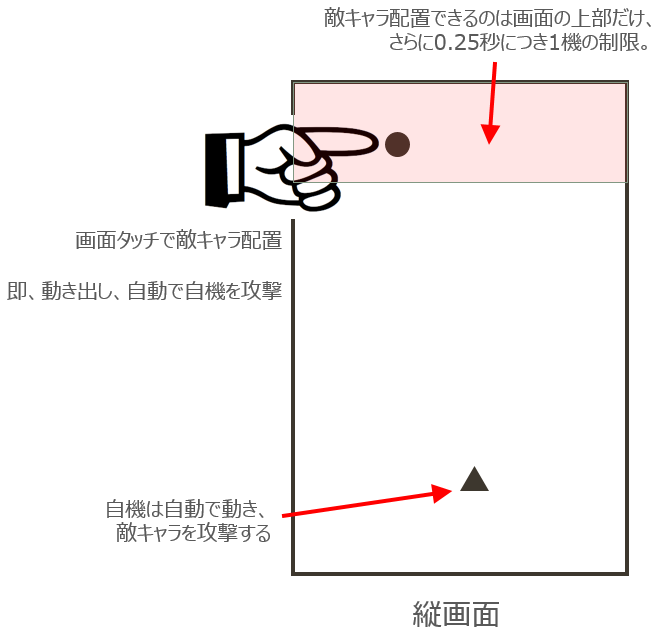
ゲームプレイヤーは敵キャラを率いる超知性体となりの進撃を防ぎます。

画面にタッチで敵キャラが配置され自機への攻撃を行ないます。

自機は自動で動き、攻撃を行ない配置された敵キャラを攻撃、破壊します。

自機が3機破壊された時点での進入距離の短さがスコアとなります。

f:id:hiro128:20160809164945p:plain

これから、このサンプルゲームを作成しながら、Cocos Sharp の実践的な使い方をご説明していきます。

では、これまでに作成したサンプルコードをゲームの概要に適するように変更していきます。

まずは、CocosSharpGameSample.iOS プロジェクトの AppDelegate.cs です。

加速度センサーに関する部分を削除します。

以下を削除します。

// 加速度センサー
private CMMotionManager cMMotionManager;
// ロックキー
private object accelerometerSyncLock = new object();

FinishedLaunching から加速度センサーに関する部分を削除します。

public override bool FinishedLaunching(UIApplication app, NSDictionary options)
{
	// ここから削除
	// 加速度センサーのセットアップ
	this.cMMotionManager = new CMMotionManager();
	// センサーの更新間隔
	cMMotionManager.AccelerometerUpdateInterval = 0.1d;
	// センサー更新時のハンドラの設定
	cMMotionManager.StartAccelerometerUpdates(NSOperationQueue.CurrentQueue, (data, error) =>
	{
		// センサーの値を書き込む
		lock (this.accelerometerSyncLock)
		{
			// 横向きなのでX,Yを入れ替え
			// X,Yの感度を調整するためセンサーのX,Y軸の取得値を調整
			AccelerometerInfo.Default.AccelerationX = data.Acceleration.Y * 8d;
			// 角度のオフセット
			double angleY = Math.Atan2(data.Acceleration.Z, data.Acceleration.X);
			AccelerometerInfo.Default.AccelerationY = Math.Sin(angleY - 30.6d) * 6d;
			AccelerometerInfo.Default.AccelerationZ = data.Acceleration.Z;
		}
	});
	// ここまで削除する

	// ゲームをを起動する。
	var application = new CCApplication();
	application.ApplicationDelegate = new SampleGameApplicationDelegate();
	application.StartGame();
	return true;
}

画面の向きを Portrait に固定に変更します。

// 画面の向きを Portrait に固定
[Export("application:supportedInterfaceOrientationsForWindow:")] 
public UIInterfaceOrientationMask GetSupportedInterfaceOrientations(UIApplication application, IntPtr forWindow)
{
	return UIInterfaceOrientationMask.Portrait;
}

以上をまとめると、CocosSharpGameSample.iOS プロジェクトの AppDelegate.cs は以下の通りになります。

using System;
using Foundation;
using UIKit;
using CoreMotion;
using CocosSharp;
using CocosSharpGameSample.Core;

namespace CocosSharpGameSample.iOS
{
	[Register("AppDelegate")]
	public partial class AppDelegate : UIApplicationDelegate
	{

		public override bool FinishedLaunching(UIApplication app, NSDictionary options)
		{
			// ゲームをを起動する。
			var application = new CCApplication();
			application.ApplicationDelegate = new SampleGameApplicationDelegate();
			application.StartGame();
			return true;
		}

		// 画面の向きを Portrait に固定
		[Export("application:supportedInterfaceOrientationsForWindow:")] 
		public UIInterfaceOrientationMask GetSupportedInterfaceOrientations(UIApplication application, IntPtr forWindow)
		{
			return UIInterfaceOrientationMask.Portrait;
		}

	}
}


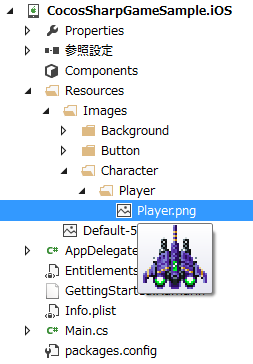
自機の画像を縦画面用に差換えます。

Resources/Images/Character/Player/Player.png

f:id:hiro128:20160809164837p:plain

※自機の画像はハムコロ様の素材を利用させていただきました。

f:id:hiro128:20160809164848p:plain

・制作者:ハムコロ様
・配付元:http://homepage2.nifty.com/hamcorossam

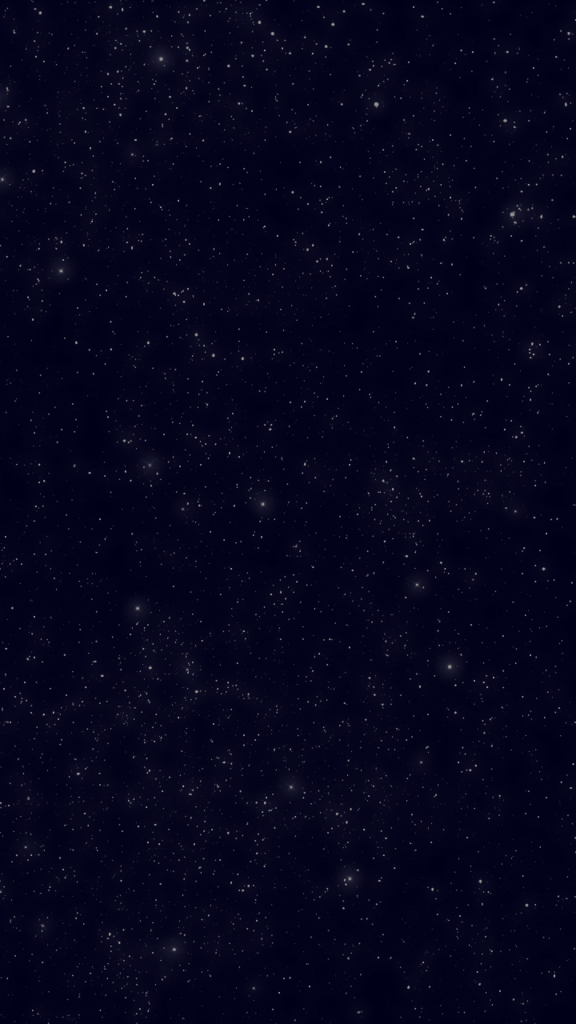
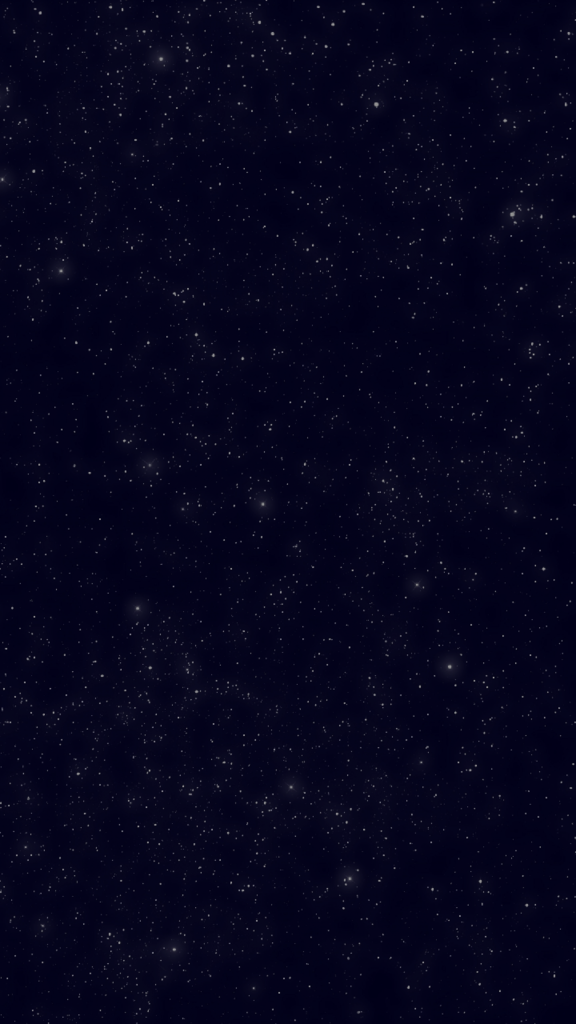
タイトルとゲームの背景画像を宇宙空間のものに差換えます。

Resources/Images/Background/GameBackground.png

f:id:hiro128:20160809164859p:plain

f:id:hiro128:20160809164906p:plain


次にCocosSharpGameSample.Android プロジェクトの MainActivity.cs を変更します。


加速度センサーに関する部分を削除します。

ISensorEventListener を削除します。

public class MainActivity : AndroidGameActivity/* この部分削除 , ISensorEventListener*/

以下を削除します。

// センサーマネージャ
private SensorManager sensorManager;
// ロックキー
private object accelerometerSyncLock = new object();

OnCreate からセンサーに関わる部分を削除します。

protected override void OnCreate(Bundle bundle)
{
	base.OnCreate(bundle);
	// ここから削除
	// センサーのセットアップ
	this.sensorManager = (SensorManager)GetSystemService(Context.SensorService);
	// ここまで削除
	// ゲームを起動する。
	var application = new CCApplication();
	application.ApplicationDelegate = new SampleGameApplicationDelegate();
	SetContentView(application.AndroidContentView);
	application.StartGame();
}

OnAccuracyChanged, OnSensorChanged, OnResume, OnPauseを削除します。

// センサーの精度が変更されたときのハンドラ
public void OnAccuracyChanged(Sensor sensor, SensorStatus accuracy)
{
	// 何もしない
}

// センサーの値が変更されたときのハンドラ
public void OnSensorChanged(SensorEvent e)
{
	lock (this.accelerometerSyncLock)
	{
		// 横向きなのでX,Yを入れ替え
		// X,Yの感度を調整するためセンサーのX,Y軸の取得値を調整
		AccelerometerInfo.Default.AccelerationX = e.Values[1] * 1.5f;
		// 角度のオフセット
		double angleY = Math.Atan2(e.Values[2], e.Values[0]);
		AccelerometerInfo.Default.AccelerationY = Math.Sin(angleY - 29.1d) * 12f;
		AccelerometerInfo.Default.AccelerationZ = e.Values[2];
	}
}

protected override void OnResume()
{
	base.OnResume();
	this.sensorManager.RegisterListener(this, sensorManager.GetDefaultSensor(SensorType.Accelerometer), SensorDelay.Game);
}

protected override void OnPause()
{
	base.OnPause();
	this.sensorManager.UnregisterListener(this);
}

画面の向きを Portrait に固定に変更します。

// 画面の向きを Portrait に固定
public override ScreenOrientation RequestedOrientation
{
	get
	{
		return ScreenOrientation.Portrait;
	}
	set
	{
		base.RequestedOrientation = ScreenOrientation.Portrait;
	}
}

以上をまとめると、CocosSharpGameSample.Android プロジェクトの MainActivity.cs は以下の通りになります。

using System;
using Android.App;
using Android.Content;
using Android.Content.PM;
using Android.Hardware;
using Android.OS;
using CocosSharp;
using CocosSharpGameSample.Core;
using Microsoft.Xna.Framework;

namespace CocosSharpGameSample.Android
{
	[Activity(Label = "CocosSharpGameSample.Android"
		, MainLauncher = true
		, Icon = "@drawable/icon"
		, AlwaysRetainTaskState = true
		, LaunchMode = LaunchMode.SingleInstance
		, ConfigurationChanges = ConfigChanges.Orientation | ConfigChanges.Keyboard | ConfigChanges.KeyboardHidden
	)]
	public class MainActivity : AndroidGameActivity
	{

		protected override void OnCreate(Bundle bundle)
		{
			base.OnCreate(bundle);
			// ゲームを起動する。
			var application = new CCApplication();
			application.ApplicationDelegate = new SampleGameApplicationDelegate();
			SetContentView(application.AndroidContentView);
			application.StartGame();
		}

		// 画面の向きを Portrait に固定
		public override ScreenOrientation RequestedOrientation
		{
			get
			{
				return ScreenOrientation.Portrait;
			}
			set
			{
				base.RequestedOrientation = ScreenOrientation.Portrait;
			}
		}

	}
}

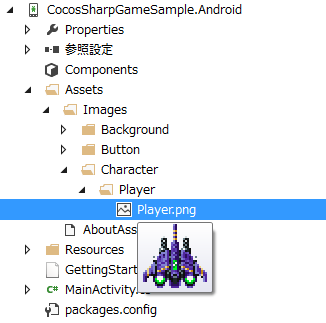
自機の画像を縦画面用に差換えます。

Assets/Images/Character/Player/Player.png

f:id:hiro128:20160809165052p:plain

※自機の画像はハムコロ様の素材を利用させていただきました。

f:id:hiro128:20160809165059p:plain

・制作者:ハムコロ様
・配付元:http://homepage2.nifty.com/hamcorossam

タイトルとゲームの背景画像を宇宙空間のものに差換えます。

Assets/Images/Background/GameBackground.png

f:id:hiro128:20160809165109p:plain

f:id:hiro128:20160809165116p:plain

次に、CocosSharpGameSample.Core プロジェクト、CrossCuttingConcerns/GameSettings.cs の画面サイズ設定を縦画面対応に変更します。

// 画面のサイズ
public const float ScreenWidth = 720f;
public const float ScreenHeight = 1280f;

以上をまとめると、CocosSharpGameSample.Core プロジェクト、CrossCuttingConcerns/GameSettings.cs は以下の通りになります。

using System;
using System.Collections.Generic;
using System.Linq;
using System.Text;

namespace CocosSharpGameSample.Core
{
	public class GameSettings
	{
		// 自機のサイズ
		public const float PlayerWidth = 32f;
		public const float PlayerHeight = 32f;

		// 画面のサイズ
		public const float ScreenWidth = 720f;
		public const float ScreenHeight = 1280f;

		// 加速度センサーの取得値の増幅倍率
		public const float AccelerationRatio = 3f;
	}
}

次に、CocosSharpGameSample.Core プロジェクト、Layers/GameLayer.cs からセンサーに関わる部分を削除します。

以下を削除します。

private CCLabel accelerationX;
private CCLabel accelerationY;
private CCLabel accelerationZ;

AddedToScene からセンサーに関わる部分を削除します。

protected override void AddedToScene()
{
	base.AddedToScene();
	// ゲーム画面の背景画像を配置
	var gameBackground = new CCSprite("/Resources/Images/Background/GameBackground.png", null);
	gameBackground.Position = new CCPoint(this.ContentSize.Center.X, this.ContentSize.Center.Y);
	AddChild(gameBackground);

	// ここから削除
	// モーションセンサーの値を表示するラベル
	this.accelerationX = new CCLabel(String.Empty, String.Empty, 40f, CCLabelFormat.SystemFont);
	this.accelerationX.HorizontalAlignment = CCTextAlignment.Left;
	this.accelerationX.VerticalAlignment = CCVerticalTextAlignment.Top;
	this.accelerationX.Color = CCColor3B.White;
	this.accelerationX.PositionX = 250f;
	this.accelerationX.PositionY = 120f;
	AddChild(this.accelerationX);

	this.accelerationY = new CCLabel(String.Empty, String.Empty, 40f, CCLabelFormat.SystemFont);
	this.accelerationY.HorizontalAlignment = CCTextAlignment.Left;
	this.accelerationY.VerticalAlignment = CCVerticalTextAlignment.Top;
	this.accelerationY.Color = CCColor3B.White;
	this.accelerationY.PositionX = 250f;
	this.accelerationY.PositionY = 80f;
	AddChild(this.accelerationY);

	this.accelerationZ = new CCLabel(String.Empty, String.Empty, 40f, CCLabelFormat.SystemFont);
	this.accelerationZ.HorizontalAlignment = CCTextAlignment.Left;
	this.accelerationZ.VerticalAlignment = CCVerticalTextAlignment.Top;
	this.accelerationZ.Color = CCColor3B.White;
	this.accelerationZ.PositionX = 250f;
	this.accelerationZ.PositionY = 40f;
	AddChild(this.accelerationZ);
	// ここまで削除

	// 自機を配置
	this.AddPlayer();

	this.StartScheduling();
}

StartScheduling からセンサーに関わる部分を削除します。

private void StartScheduling()
{
	// ここから削除
	this.Schedule(t => this.UpdateAccelerationLabels(), 0.2f);
	// ここまで削除
	this.Schedule(t => this.UpdatePlayer(), 0.02f);
}

UpdateAccelerationLabels を削除します。

// ここから削除
private void UpdateAccelerationLabels()
{
	this.accelerationX.Text = "X : " + (AccelerometerInfo.Default.AccelerationX >= 0 ? "+" : String.Empty) + AccelerometerInfo.Default.AccelerationX.ToString("0.00000000");
	this.accelerationY.Text = "Y : " + (AccelerometerInfo.Default.AccelerationY >= 0 ? "+" : String.Empty) + AccelerometerInfo.Default.AccelerationY.ToString("0.00000000");
	this.accelerationZ.Text = "Z : " + (AccelerometerInfo.Default.AccelerationZ >= 0 ? "+" : String.Empty) + AccelerometerInfo.Default.AccelerationZ.ToString("0.00000000");
}
// ここまで削除

UpdatePlayer からセンサーに関わる部分を削除します。

private void UpdatePlayer()
{
	// ここから削除
	float accelerationX = (float)AccelerometerInfo.Default.AccelerationX * GameSettings.AccelerationRatio;
	float accelerationY = -(float)AccelerometerInfo.Default.AccelerationY * GameSettings.AccelerationRatio;
	// ここまで削除

	// ここから変更
	this.player.PositionX = this.player.PositionX;
	this.player.PositionY = this.player.PositionY;
	// ここまで変更

	// 画面からはみ出ないように、位置の値の上限、下限を設定します。
	// 左
	if (this.player.PositionX < 0 + GameSettings.PlayerWidth)
	{
		this.player.PositionX = 0 + GameSettings.PlayerWidth;
	}
	// 右
	if (this.player.PositionX > GameSettings.ScreenWidth - GameSettings.PlayerWidth)
	{
		this.player.PositionX = GameSettings.ScreenWidth - GameSettings.PlayerWidth;
	}
	// 下
	if (this.player.PositionY < 0 + GameSettings.PlayerHeight)
	{
		this.player.PositionY = 0 + GameSettings.PlayerHeight;
	}
	// 上
	if (this.player.PositionY > GameSettings.ScreenHeight - GameSettings.PlayerHeight)
	{
		this.player.PositionY = GameSettings.ScreenHeight - GameSettings.PlayerHeight;
	}
}

以上をまとめると、CocosSharpGameSample.Core プロジェクト、CrossCuttingConcerns/GameLayer.cs は以下の通りになります。

using System;
using System.Diagnostics;
using CocosSharp;

namespace CocosSharpGameSample.Core
{
	public class GameLayer : LayerBase
	{

		private CCNode player;

		public GameLayer()
			: base()
		{
		}

		protected override void AddedToScene()
		{
			base.AddedToScene();
			// ゲーム画面の背景画像を配置
			var gameBackground = new CCSprite("/Resources/Images/Background/GameBackground.png", null);
			gameBackground.Position = new CCPoint(this.ContentSize.Center.X, this.ContentSize.Center.Y);
			AddChild(gameBackground);

			// 自機を配置
			this.AddPlayer();

			this.StartScheduling();
		}

		private void StartScheduling()
		{
			this.Schedule(t => this.UpdatePlayer(), 0.02f);
		}

		private void AddPlayer()
		{
			this.player = new CCSprite("/Resources/Images/Character/Player/Player.png", null);
			this.player.Position = new CCPoint(this.ContentSize.Center.X, this.ContentSize.Center.Y);
			this.AddChild(this.player);
		}

		private void UpdatePlayer()
		{
			this.player.PositionX = this.player.PositionX;
			this.player.PositionY = this.player.PositionY;

			// 画面からはみ出ないように、位置の値の上限、下限を設定します。
			// 左
			if (this.player.PositionX < 0 + GameSettings.PlayerWidth)
			{
				this.player.PositionX = 0 + GameSettings.PlayerWidth;
			}
			// 右
			if (this.player.PositionX > GameSettings.ScreenWidth - GameSettings.PlayerWidth)
			{
				this.player.PositionX = GameSettings.ScreenWidth - GameSettings.PlayerWidth;
			}
			// 下
			if (this.player.PositionY < 0 + GameSettings.PlayerHeight)
			{
				this.player.PositionY = 0 + GameSettings.PlayerHeight;
			}
			// 上
			if (this.player.PositionY > GameSettings.ScreenHeight - GameSettings.PlayerHeight)
			{
				this.player.PositionY = GameSettings.ScreenHeight - GameSettings.PlayerHeight;
			}
		}

	}
}

次に、CocosSharpGameSample.Core プロジェクト、Layers/TitleLayer.cs のタイトル背景画像を差換えます。

protected override void AddedToScene()
{
	base.AddedToScene();
	// タイトル画像を配置
	var title = new CCSprite("/Resources/Images/Background/GameBackground.png", null);// 画像を GameBackground.png に差換えます。
	title.Position = new CCPoint(this.ContentSize.Center.X, this.ContentSize.Center.Y);
	this.AddChild(title);

	// スタートボタンを配置
	var startButton = new CCSprite("/Resources/Images/Button/ButtonStart.png", null);
	startButton.Position = new CCPoint(this.ContentSize.Center.X, 100f);

	// 後から参照できるようにタグを設定
	startButton.Tag = (int)NodeTag.StartButton;
	this.AddChild(startButton);

	// ボタンタップ検出用のイベントリスナー作成
	var eventListener = new CCEventListenerTouchOneByOne();
	eventListener.OnTouchBegan = this.EventListener_TouchBegan;
	eventListener.OnTouchEnded = this.EventListener_TouchEnded;
	this.AddEventListener(eventListener, this);
}

以上をまとめると、CocosSharpGameSample.Core プロジェクト、CrossCuttingConcerns/TitleLayer.cs は以下の通りになります。

using CocosSharp;

namespace CocosSharpGameSample.Core
{
	public class TitleLayer : LayerBase
	{

		public TitleLayer()
			: base()
		{
		}

		protected override void AddedToScene()
		{
			base.AddedToScene();
			// タイトル画像を配置
			var title = new CCSprite("/Resources/Images/Background/GameBackground.png", null);
			title.Position = new CCPoint(this.ContentSize.Center.X, this.ContentSize.Center.Y);
			this.AddChild(title);

			// スタートボタンを配置
			var startButton = new CCSprite("/Resources/Images/Button/ButtonStart.png", null);
			startButton.Position = new CCPoint(this.ContentSize.Center.X, 100f);

			// 後から参照できるようにタグを設定
			startButton.Tag = (int)NodeTag.StartButton;
			this.AddChild(startButton);

			// ボタンタップ検出用のイベントリスナー作成
			var eventListener = new CCEventListenerTouchOneByOne();
			eventListener.OnTouchBegan = this.EventListener_TouchBegan;
			eventListener.OnTouchEnded = this.EventListener_TouchEnded;
			this.AddEventListener(eventListener, this);
		}

		private bool EventListener_TouchBegan(CCTouch touch, CCEvent e)
		{
			// OnTouchBegan で true を返却しないと、OnTouchEndedが発動しない。
			return true;
		}

		private void EventListener_TouchEnded(CCTouch touch, CCEvent e)
		{
			// タッチした座標でボタンが押されたかを判定
			CCNode startButton = this.GetChildByTag((int)NodeTag.StartButton);
			if (startButton.BoundingBox.ContainsPoint(touch.Location))
			{
				// 移動先のシーンを作成
				var newScene = new CCScene(this.Window);
				var gameLayer = new GameLayer();
				newScene.AddChild(gameLayer);

				// シーン切り替え時の効果を設定
				CCTransitionScene cCTransitionScene = new CCTransitionFade(1.0f, newScene);

				// ゲーム画面へシーン切り替え
				this.Director.ReplaceScene(cCTransitionScene);
			}
		}

	}
}

これで、縦画面のゲーム作成の準備が整いました。

今回は、ここまでです。

Xamarin iOS + Azure Storage の利用方法(1) ストレージ アカウントの作成

モバイルアプリのバックエンドにAzureを使用し、画像データなどを管理したい場合は、Azure Storageを利用できます。

まず、Azureにストレージ アカウントを作成します。

新規 → データ + ストレージ → ストレージ アカウントをクリック

f:id:hiro128:20160728103639p:plain

アカウントの情報を入力し、「作成」をクリックします。

f:id:hiro128:20160728103816p:plain

作成が完了するのを待ちます。

次に、BLOBのコンテナーを作成します。

サービスの「BLOB」をクリックし、「+コンテナー」をクリックします。

f:id:hiro128:20160728104053p:plain

コンテナーの名前とアクセスの種類を入力します。
アクセスの種類は「BLOB」にします。

f:id:hiro128:20160728104215p:plain

「作成」をクリックします。

コンテナーが作成されました。

f:id:hiro128:20160728104251p:plain

今回はここまでです。